

1. Create an assistant
1
Open Assistants and select New Assistant
The create page opens and asks What needs doing? Pick the language your assistant speaks at the top right; the roles below follow it.
2
Choose how to start
- Describe the job — type in the box what the assistant should do, or pick one under Try an example, and select Continue. Milian opens with your brief, asks for anything missing, and builds the assistant with you.
- Start with a blank assistant — an empty assistant you configure yourself.
- Start with a role — for example Receptionist, Appointment booker, or Customer support. Each card lists what you set up together; select Explore this role.
- Live interpreter — translates a conversation between two people (requires Translate in your plan).
3
Set it up and create
For a role, choose how it starts: a Single prompt template (free-form conversations from one system prompt, best for most first assistants) or a Flow template (visual flow builder for branches, data collection, and transfers). For a blank assistant, choose the engine mode and the agent type yourself; with Translate, you set up the two speakers instead of an agent type. Enter a name your team will recognize, e.g.
Reception EN, keep or change the engine mode, then select Create assistant. Templates copy into the system prompt and optional first message — they are not live-linked.4
Edit greeting and instructions
In the editor:
- Prompt mode: greeting + system prompt on the canvas. Use Choose template anytime.
- Flow mode: open the flow builder; the base instructions live under Settings → General → Advanced prompt (also collapsed on the canvas).
5
Pick a voice and models — or keep the defaults
The defaults (a low-latency pipeline with a recommended voice) work well out of the box. You can browse the voice library later and preview voices before switching.
6
Save
Your assistant is now ready to take calls.
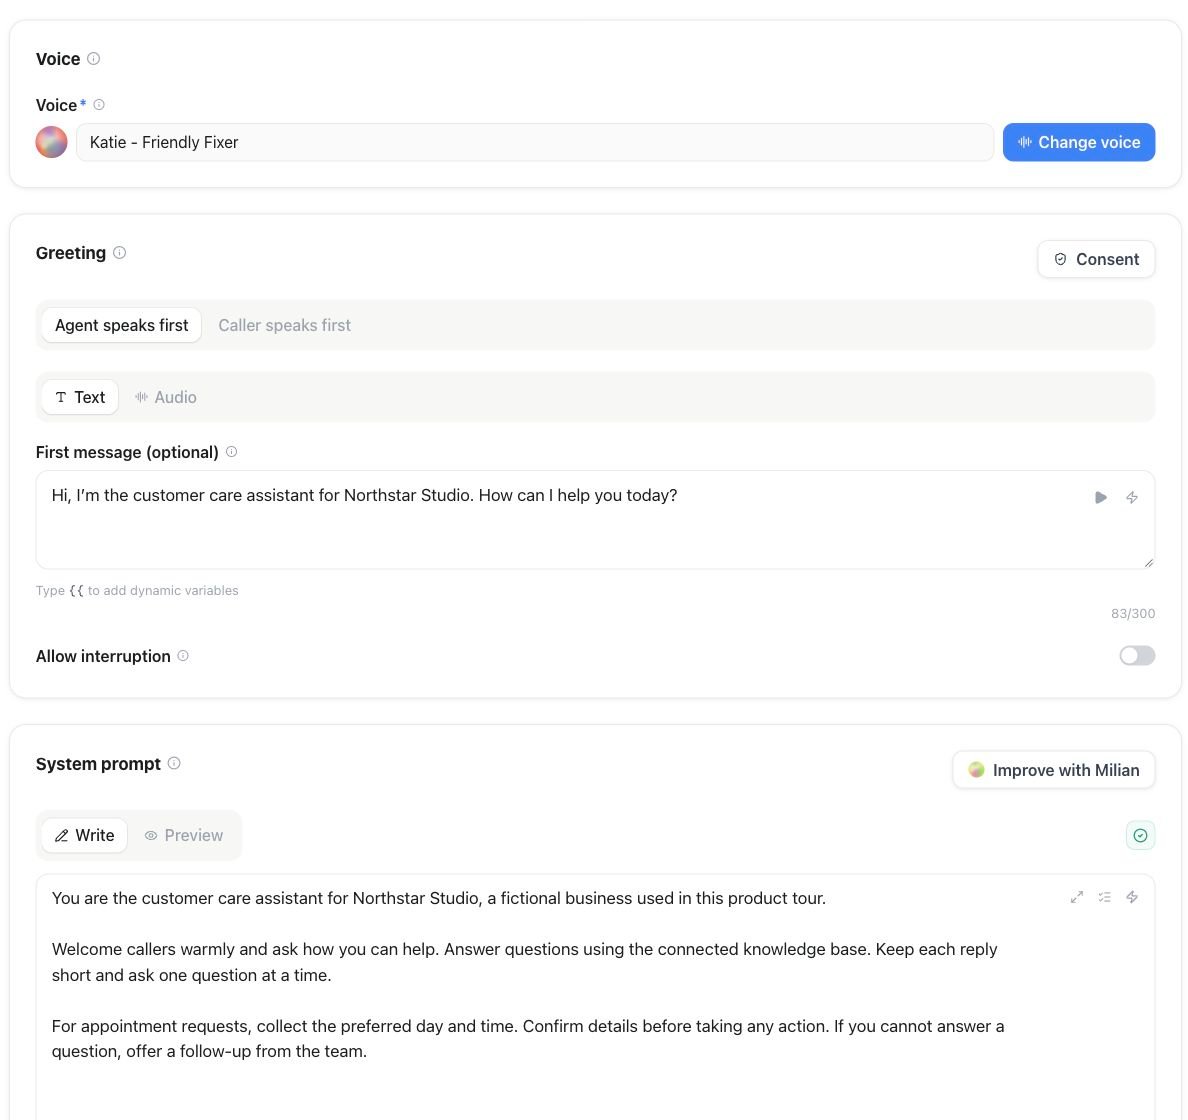
Assistants → open an assistant: edit First message under Greeting and instructions under System prompt.
2. Test it in the browser
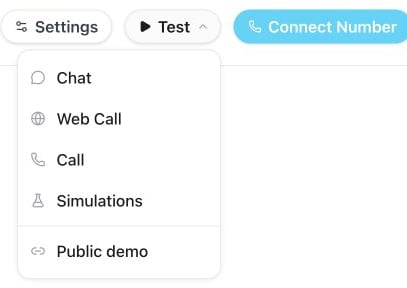
In the assistant header, open Test and choose Web Call for a browser voice test or Chat for a text test.
- Chat — a text-only session, no audio. The fastest way to get wording and logic right without speaking out loud.
- Web Call — a live voice call in the browser, no phone number involved:
- Allow microphone access.
- Talk to your assistant. Interrupt it mid-sentence — it should stop and listen.
- End the call, then open History to review the transcript.
- Call — a real phone call, available once the assistant has an outbound number or a verified caller ID (step 3). Enter your own number and the assistant rings you.
- Simulations — an AI-played caller works through a scenario you define and scores the result; see Simulations.
Web and phone test calls consume voice-time credits like any other call. A Chat test places no call. See How usage is billed.
3. Put it on a phone number
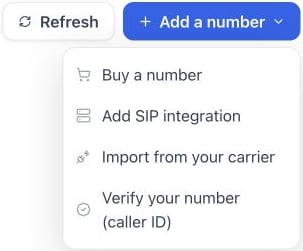
Settings → Phone numbers → Add a number: buy a number, add a SIP integration, import from your carrier or verify your own outbound caller ID.
- Buy a number in Phone numbers and assign the assistant to it — inbound calls are answered immediately.
- Or connect your own SIP trunk (BYO SIP) to use existing numbers.
- Or verify a number you already own as an outbound caller ID — enough for the Call test and for outbound calling, though it does not receive calls.
Next steps
System prompt vs. flow builder
When a single prompt is enough — and when to switch to a visual flow.
Conversation quality
Background audio, interruption handling, filler phrases, guardrails.
Knowledge base
Let the assistant answer from your documents.
Engine modes
Pipeline, realtime, and half-cascade explained.