

Caller ID verification is outbound only. It doesn’t create an inbound route — calls placed to that number are never answered by an assistant. To also receive calls, buy a marketplace number or forward your existing line to one instead.
How verification works
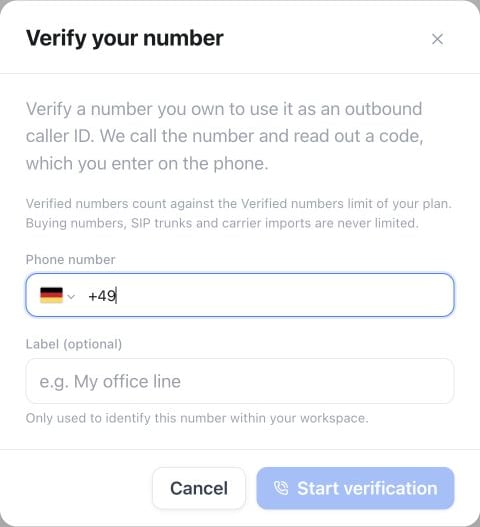
Settings → Phone numbers → Add a number → Verify your number (caller ID): enter the number and optional label. Start verification begins the verification call.
1
Open the verification form
Go to Settings → Numbers, open the Add a number menu, and choose Verify your number (caller ID).
2
Enter the number
Enter the number in E.164 format (for example
+4930123456) and an optional label, then start verification.3
Answer the call and enter the code
The platform calls that number immediately and shows a short code on screen. Whoever answers keys that code in on the phone.
4
Wait for confirmation
The status updates automatically once the code is confirmed — no page refresh needed, though you can press Check status to look right away. The number is now a verified caller ID.
Plan quotas for Caller IDs
Your plan determines how many verified caller IDs your workspace can maintain simultaneously. A caller ID slot is occupied while verification is pending or active; deleting a verified number frees its slot immediately.Important distinction: The verified number quota applies only to verified caller IDs. Buying phone numbers from the platform marketplace, connecting your own BYO SIP trunks, and importing carrier numbers are never capped by this limit.
Using a verified caller ID
Once verified, the number appears alongside your other numbers under Numbers. Open Configure on that row and connect it to an assistant under Outbound — outbound calls placed by that assistant, by a campaign, or through themake_call API/MCP tool then present the verified number to the person you’re calling.
Calls placed with a verified caller ID still count against your daily outbound allowance, the same as marketplace numbers. Only calls placed over your own BYO SIP trunk skip that allowance.
If you connect numbers through a SIP trunk instead, your provider — not this verification flow — controls which caller ID is presented; configure it on the provider side.
Legal considerations
API and MCP
Manage caller IDs with the Public API —GET/POST /api/v1/caller-ids, PATCH/DELETE /api/v1/caller-ids/{id} — or the equivalent MCP tools: create_caller_id, list_caller_ids, update_caller_id, delete_caller_id.
During Setup mode, the configured preparation template (Agency by default) supplies verified caller-ID capacity unless the workspace has its own active plan; that plan then determines capacity. Verification still requires any applicable credit top-up and passes the same safety checks. Setup mode does not include free marketplace phone numbers.