

Voice + chat, one assistant
- Voice — a click starts a live voice conversation using the assistant’s full configuration: engine mode, voice, knowledge base, tools, guardrails. During the session, the panel keeps the presence visual large and shows the latest spoken words in small caption groups; the full transcript remains available in History, where web calls use direction
web. - Chat — the same assistant, prompts, and knowledge base in text form, for visitors who can’t or won’t speak.
Visitor languages
All standard widget controls, form prompts, verification screens and error messages support 86 languages. The visitor’s preferred browser language is used first. Country detection supplies a fallback; English is used when no supported language can be determined. Right-to-left languages use a matching layout. Your own greetings, assistant names, edited field labels and other custom text stay exactly as written. Conversation content is not translated by the widget. The security challenge uses its own supported languages.Embedding
Create a widget under Settings → Channels → Web Widget, then paste a snippet from the editor. Choose Display:- Floating
- Inline
The default — a corner launcher bubble. Position and Initial state apply. Prefer the script loader (it sets
allow="microphone" on the iframe automatically):Allowed websites
List the website(s) that may embed the widget (exact origins likehttps://example.com, or subdomain wildcards like *.example.com). Localhost is supported for development. Origins are optional when creating or saving a widget.
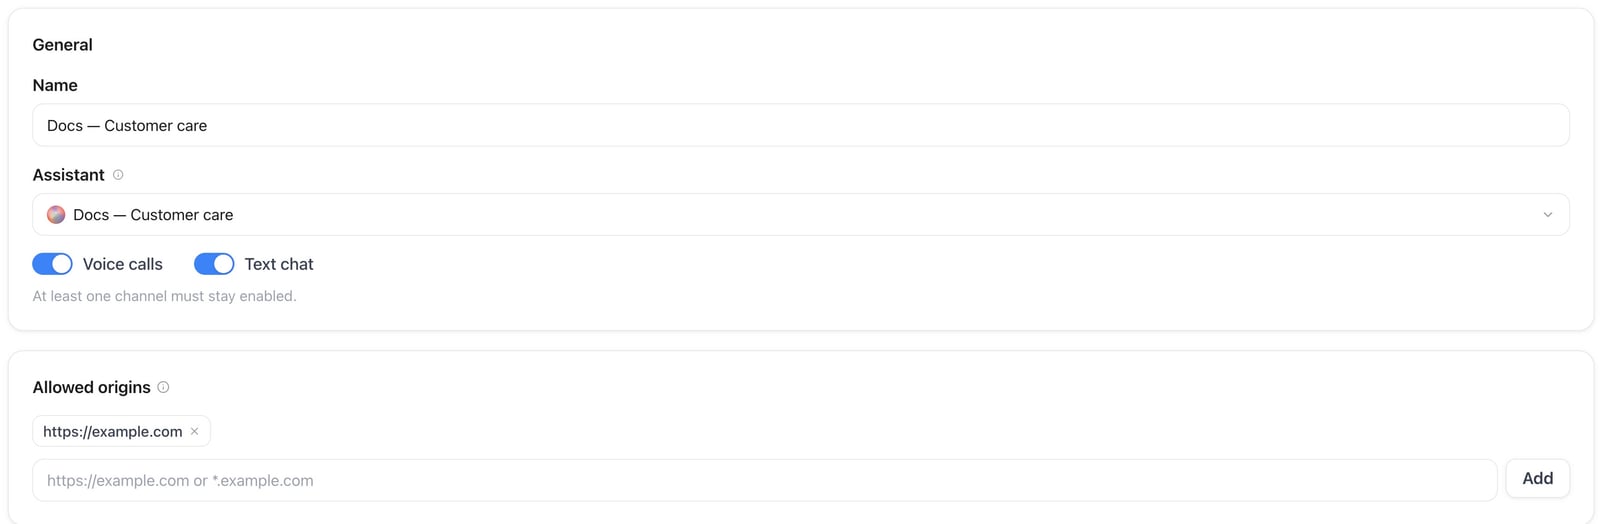
Web Widget & AI Avatar — settings of an inactive example widget
- An empty allowlist does not mean “open to any site”: foreign origins are blocked. Only the platform domain itself stays allowed so the in-app live preview keeps working.
- Add every website host that will load the snippet before going live. If the widget fails to load on a customer site, check Allowed websites first.
Customization
- Display — Floating (corner launcher) or Inline (in-page embed). Position and Initial state only apply to Floating.
- Colors and branding — launcher color, panel accent, logo; tenant branding applies automatically on white-label domains.
- Position — corner placement of the floating launcher (hidden for Inline).
- Modes — voice-only, chat-only, or both.
- Voice presence — classic audio visualizer, or a virtual AI avatar (see below).
- Visualizer style — Aura, Bar, Wave, Radial, Grid, Satin or Halftone. Satin (glossy) and Halftone (dot print) are animated orbs in your accent color: the outline stays still while the inside moves with the assistant’s voice, and the call button sits on the orb’s lower edge.
- Launcher icon — Assistant orb, Chat bubbles, Question mark, Smiley face, Team, or Hand wave. Applies to chat-only, voice-only, and both. Assistant avatar is also available when the selected assistant has a profile picture. Logo uses the widget header logo.
- Launcher label — presets (No text default; Help, Ask anything, Assistance, Support, Live Chat, Need help?) translated from the visitor’s browser language. Avatar-only still uses optional custom launcher text for the glass CTA.
- Texts — welcome message, AI disclosure, privacy notice.
- Pre-chat form — optional form before chat or voice starts (see below).
Virtual AI avatar
Virtual avatars require the AI Avatar feature. In the widget editor, set Voice presence to AI avatar and pick an avatar.- Layouts
- Avatar only (full-bleed) — compact card focused on the face. Floating widgets can start Expanded or Minimized; Inline always shows the card in place.
- Avatar + chat — avatar presence with the classic chat/voice panel chrome.
- Billing — voice sessions bill the normal talk-minute rate, plus the Web widget virtual avatar surcharge per minute while a virtual avatar is active; plain text chat messages sent and received bill credits per message at the workspace’s Web chat (sent) / Web chat (received) rate. Current rates are on the Usage page; see also How usage is billed.
- Without AI Avatar access, the editor shows an upgrade option and the API rejects enabling avatar presence.
Pre-chat form
Open the widget in the editor, go to the Messages tab, find Pre-chat form, and turn on Enable. Visitors then fill in fields before the session starts.- Suggestions come from contact fields (name, email, phone), the selected assistant’s input variables, and workspace Audience attributes. You can also add custom keys.
- Submitted values become call input variables (
{{variable_key}}), update the Audience lead when identity fields are present, and appear in History under Pre-chat form / Input variables. - Required fields are validated before a visitor can start a session.
Things to check before going live
1
Add at least one allowed website
List every site that will embed the widget. Without origins, third-party hosts cannot load config or mint tokens.
2
Test the assistant with browser calls first
The widget uses the same web-call path as the assistant editor’s test call — if that sounds right, the widget will too.
3
Mind microphone permissions
Browsers require HTTPS for microphone access. The host page must not block microphone via
Permissions-Policy. Script/web-component embeds set allow="microphone" on the iframe automatically.4
Update your privacy policy
Voice conversations are processed like calls (transcripts, optional recording with consent flow). Mention the widget in your privacy policy.
Troubleshooting
Widget doesn't appear at all
Widget doesn't appear at all
Confirm the embed snippet sits before the closing
</body> tag, hard-refresh (or test in a private window) to rule out cached HTML, check your plan includes the web widget, and look for JavaScript errors in the browser console. Copy the snippet fresh from the widget editor if you’ve since changed the connector’s key.Widget loads elsewhere but not on this site
Widget loads elsewhere but not on this site
Check Allowed websites first. An empty allowlist blocks every foreign host by design; add the exact origin (or a
*.example.com wildcard) the widget is embedded on.Voice doesn't start
Voice doesn't start
Voice requires HTTPS. Confirm the page is served over HTTPS, the browser has granted microphone permission, the microphone works in other apps, and no VPN or firewall is blocking WebRTC. Script and web-component embeds set
allow="microphone" automatically — a raw iframe embed needs that attribute added manually.Chat doesn't respond
Chat doesn't respond
Check the browser console for errors, confirm the assistant works from a test call/chat in the assistant editor, and reload the page to start a fresh widget session.
Pre-chat form answers don't reach the assistant
Pre-chat form answers don't reach the assistant
Answers arrive under each field’s key, so pick the suggestion (or set the custom key) that matches the variable your assistant reads, and save the widget before testing again.
Changes in the editor don't show up
Changes in the editor don't show up
Make sure you saved the widget settings, then hard-refresh or test in a private window; an old cached embed snippet can also mask a fresh config change.
Embedding in WordPress or another CMS
Embedding in WordPress or another CMS
Use a Custom HTML block, keep the snippet before the closing
</body> tag, and clear any caching plugin’s cache after saving. Security/firewall plugins occasionally block the widget script — disable one at a time to isolate the cause.API & MCP
Manage widgets programmatically via the public REST API (/api/v1/widget-connectors) and MCP tools (create_widget_connector, update_widget_connector, …). allowed_origins is optional; empty or omitted blocks third-party hosts. Scope: assistants:write. Widget and AI Avatar access follow your plan.
New widgets default to Assistant avatar under Logo, so the header follows the selected assistant’s current picture automatically. Choose Custom logo to show the upload control. Click the image to upload or replace it. Custom logos remain independent when you switch sources; save to publish. Existing widgets keep their current logo until you change the source.
update_widget_connector MCP tool.
To switch the voice visualizer to an orb, set the visualizer style in the theme (satin or halftone). The theme object replaces the current theme, so include any other theme settings you want to keep.
Verify visitors by email or SMS
In Settings → Web widgets, enable Verify visitors before starting and select Email or SMS. This is available in direct platform workspaces and a reseller’s own workspace, including workspaces with their own branding. It is unavailable in reseller customer workspaces. Email codes are sent through the platform without additional credits. No workspace email sender setup is required. SMS verification accepts international mobile numbers in supported destinations. Select the country code manually or use the country suggested from your location. Delivery depends on destination availability. Saving with SMS verification enabled accepts the price shown next to SMS and in the info tooltip: currently 80 credits per accepted verification SMS, including resends. Checking a code and returning with a valid browser permission are free. Rejected SMS sends release their credit reservation; uncertain sends remain pending until resolved. Verification messages do not appear as conversation entries in History. Visitors enter the selected email address or phone number in the existing form, then enter a six-digit code. SMS also requires consent to receive that text. Codes expire after 10 minutes and checks and resends are limited. Chat and voice require successful verification. A verified email confirms that email only; a verified phone confirms that number only. Other addresses entered in the form are not automatically trusted or merged. Remember this browser keeps a revocable permission for 7 days; turning it off limits the session permission to at most 30 minutes. Browsers store the permission, never the code. Privacy settings may limit it to the current page. Forget this browser, expiry, and widget configuration or verification-method changes invalidate the permission. Changing the verified address requires another verification. Enable Web Chat and Web Voice separately under Settings → Memory and in the assistant’s memory read/write settings. The plan must include memory and the visitor must separately allow it. These web channels and SMS memory are available only in root workspaces; ordinary SMS sending in reseller customer workspaces is unaffected. Anonymous web sessions never use customer memory. Scope, category, consent and retention rules still apply, and visitors can change memory permission without requesting another code. Public REST API and MCP expose the same verification method, availability, SMS price and memory channel choices. Read the current availability and price before activating SMS verification; email requires platform email verification to be available instead of SMS price acceptance.Chat reply timing
Under Chat text → Reply delay, choose Disabled, Fixed time, or Dynamic. Disabled adds no artificial wait: typing dots appear while the assistant prepares its reply, which is shown as soon as it arrives. Fixed time shows one wait-time slider. Dynamic automatically selects a new 1–10 second wait for each reply, with no extra controls. The fixed-time slider supports 0–10 seconds. The selected duration is a minimum display wait; a slower assistant may take longer. Voice calls are unaffected. The same setting is available through the widget create/update API and MCP tools.File and image uploads
Visitors can attach files to a chat message with the paperclip, by dragging files onto the composer, or by pasting an image. Uploads start immediately and show a preview chip; the message can be sent once every file is ready. Supported: PNG, JPG, WEBP, GIF, PDF, DOCX, TXT, MD, CSV and JSON, up to 10 MB each and 5 files per message. Images are shown to the assistant directly (the chat model must support image input; otherwise a short generated description is used). Documents are read as text and handed to the assistant with the message. Attachments appear in the visitor’s bubble, in the assistant chat preview in the dashboard, and later in History on the chat’s transcript, where images render inline with their caption and files can be opened via a temporary link. Uploads are on by default. Turn them off per widget under Pre-chat form → Allow file and image uploads in chat (also available aschat_attachments_enabled in the widget theme through the API and MCP). Files are stored in your workspace’s private media storage together with the chat history and are removed by your data retention settings when the transcript or the chat is purged, and when the workspace is deleted.
Web chat automations
Use Automations → Conversation started, select your assistant, and optionally choose Web chat as the platform. This runs when the visitor connects to the chat, including in the widget preview. With a pre-chat form, this happens after Continue and successful validation; opening the widget alone does not start a conversation. Reconnecting to the same session does not create another run. Use an HTTP Request action to send a webhook to your system. Submitted fields are available as{{data.preform.values.customer_email}} (replace the last part with your field key); assistant input variables are under data.input_variables. The event includes the conversation, assistant and widget connection references plus available contact details. This is an asynchronous notification; it does not return variables into the assistant prompt.
Screen sharing
Enable General → Screen sharing to let visitors show a screen, window or browser tab to the AI assistant during a chat or voice session. It is off by default and requires both Web widget and Widget screen sharing in the workspace plan. The switch is unavailable when the plan excludes screen sharing. The displayed credit rate applies per actual minute shared; voice and avatar charges are added when those features are active. History shows the shared duration and its credit portion. File and image uploads keep their own setting. After starting a conversation, the visitor selects the screen icon next to the microphone (voice) or the paperclip (chat), chooses what to share in the browser dialog, then asks a question about the visible content. The icon stays highlighted while sharing; selecting it again stops sharing, just like muting the microphone. Ending the session, changing the widget tab or closing the widget also stops sharing. System and tab audio are not shared. Use a desktop browser that supports screen capture and an HTTPS page; on phones the icon is hidden. For existing iframe embeds, adddisplay-capture to the iframe’s allow attribute and ensure the host’s Permissions Policy permits it. Script embeds include this permission automatically. The assistant can describe visible content; it cannot click or control the visitor’s device. Screenshots are processed on demand and are not saved as attachments; descriptions may be included in conversation history.
Configure this through the widget create/update REST API, the create_widget_connector and update_widget_connector MCP tools, or the CLI: