Follow these steps to connect DIDLogic with Famulor for inbound and outbound calling.
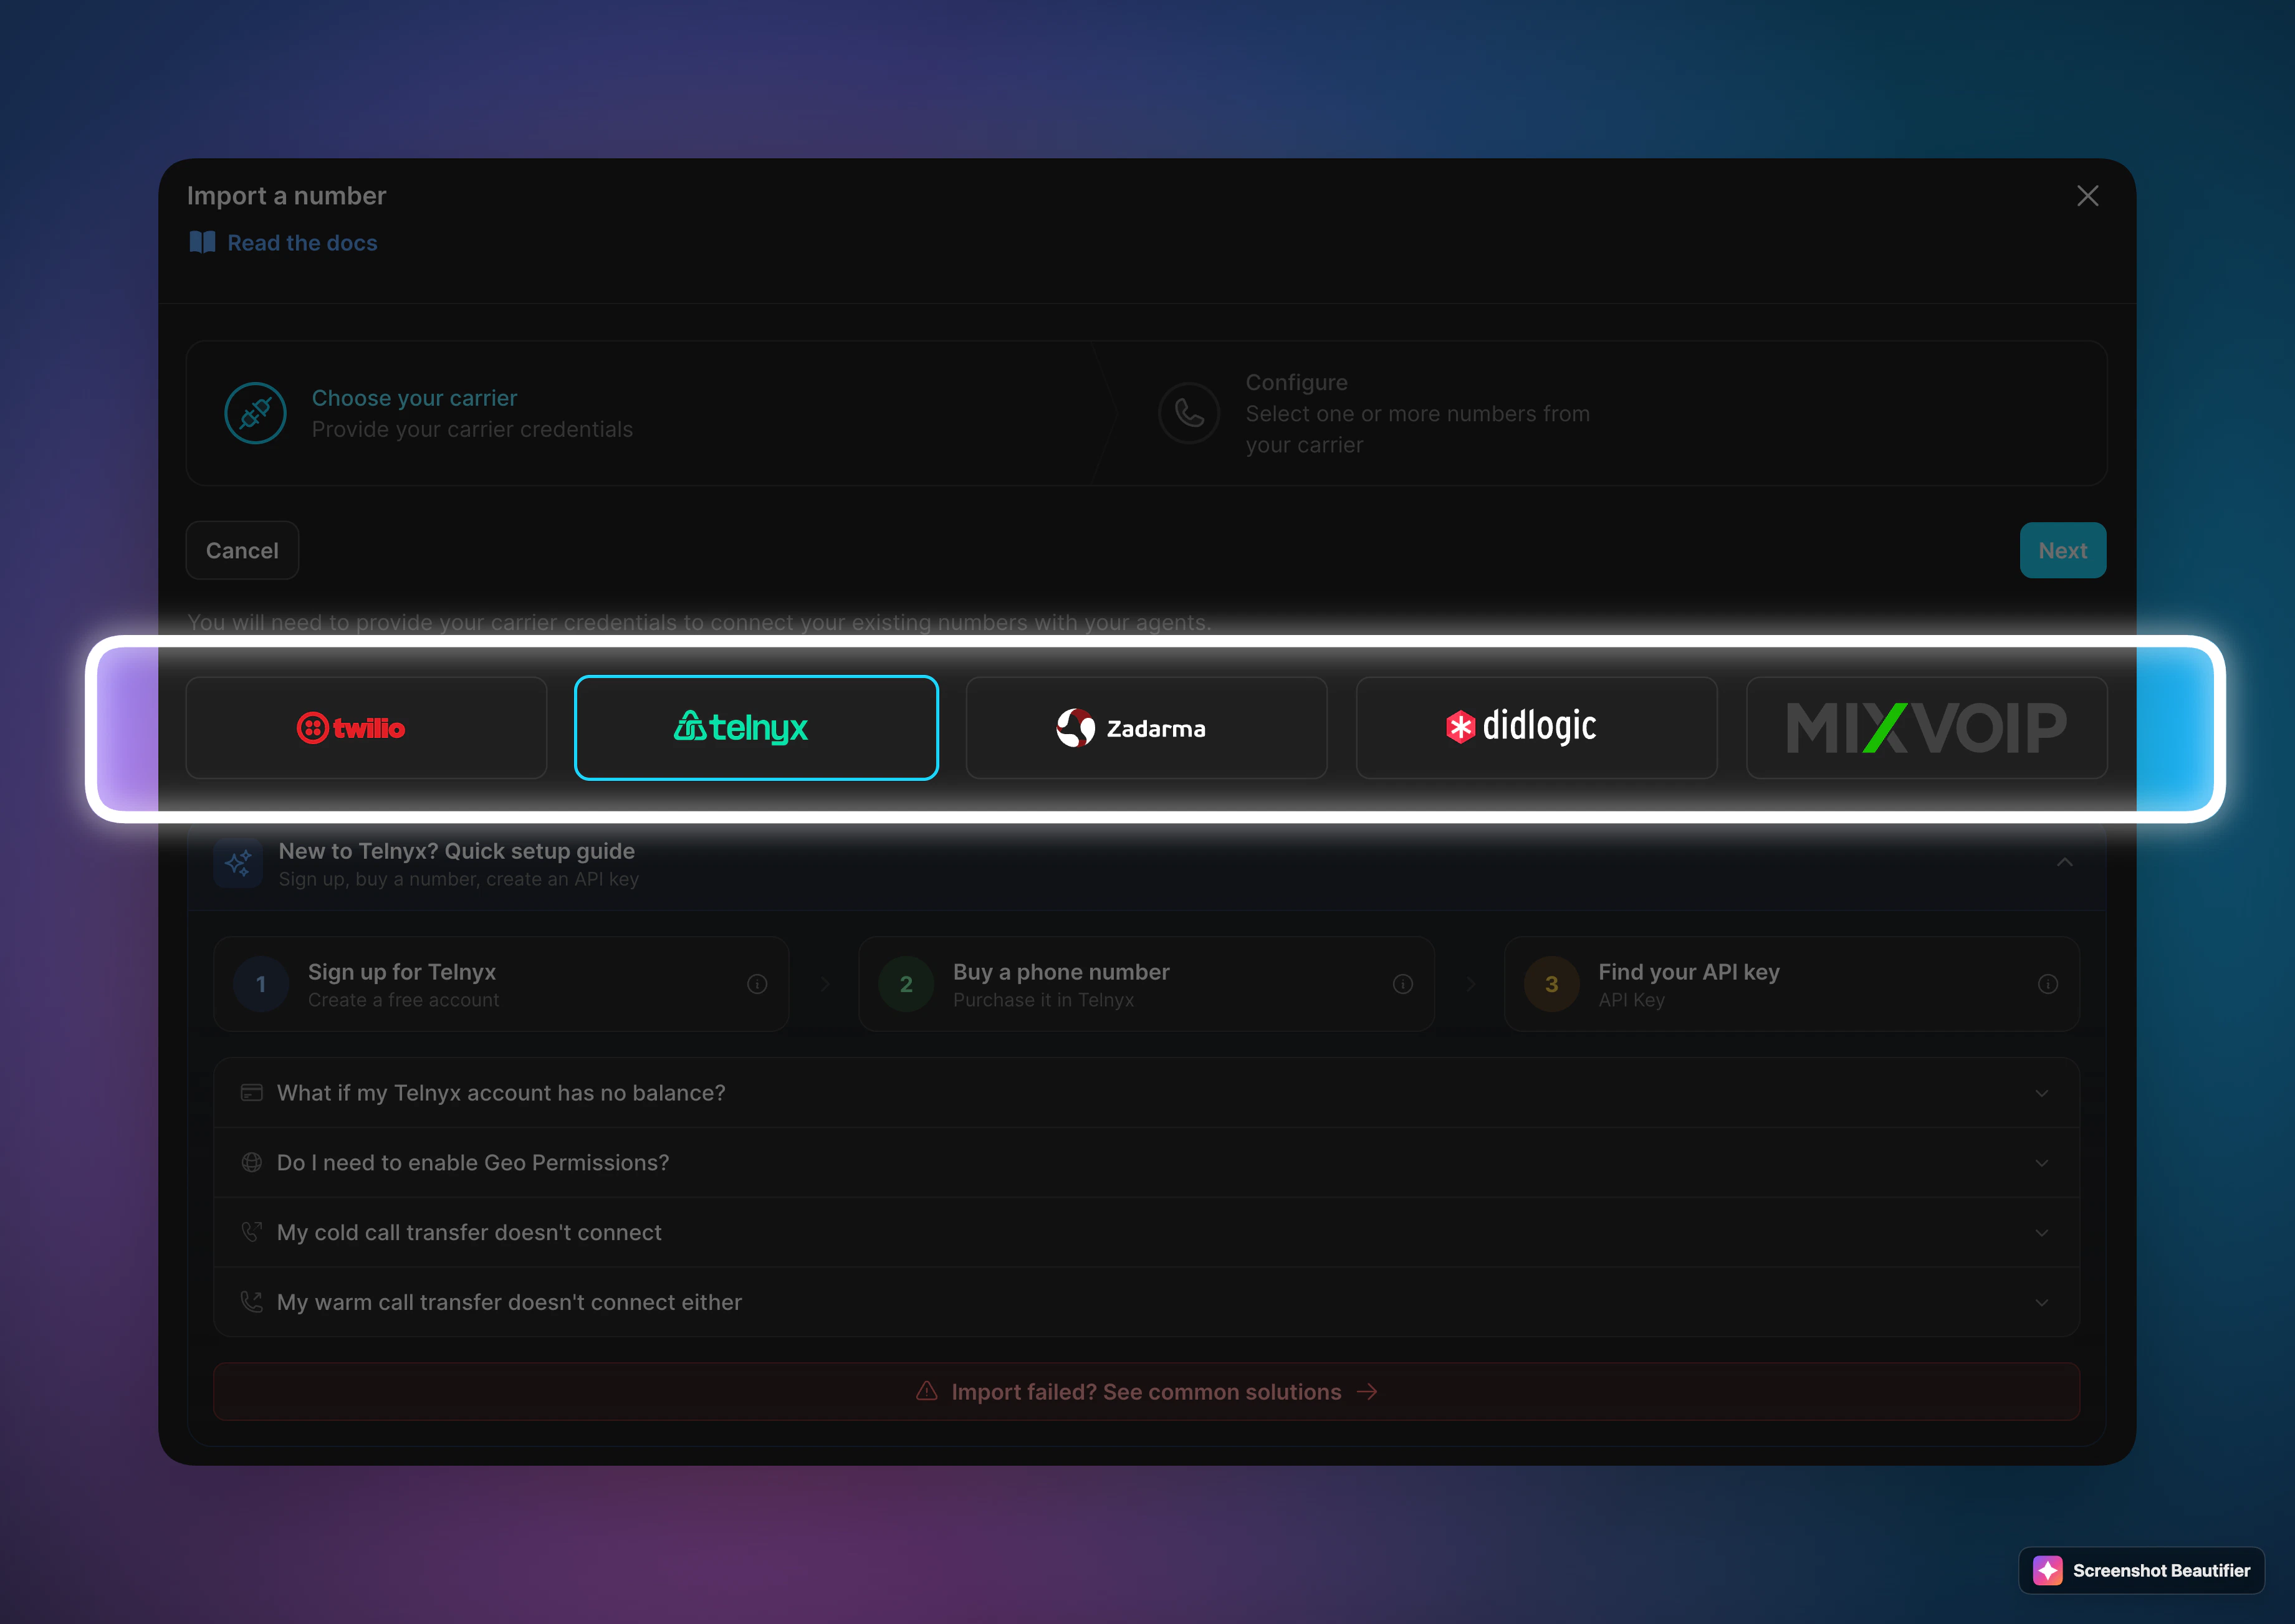
Phone number import (BYOC): Open Your Phone Numbers → Integrate SIP trunk in the Famulor dashboard. The wizard lists Twilio, Telnyx, Zadarma, and DIDLogic. Import number creates what you need on Famulor’s side and imports your numbers from the carrier once your account is linked—you do not need to fill every SIP field by hand. Use Import number, or follow this guide below for full manual setup. Overview: SIP Integration. The steps below document manual DIDLogic SIP trunking.
Pricing snapshot: DIDLogic publishes public DID and SIP termination pricing, but the country coverage on the live pricing pages is not equally detailed for every market.
- Inbound / number rental examples: United States/Canada from
$0.99/month+$0.0059/min, United Kingdom from$2.50/month+$0.012/min - Outbound / SIP trunking: SIP channels are free; outbound rates are pay-as-you-go via the live call-rate table and CSV
- Germany / Switzerland: No reliable public DID example was visible on the live pricing page at the time of writing
- Official pricing: DID pricing and call rates
Purchase a Phone Number
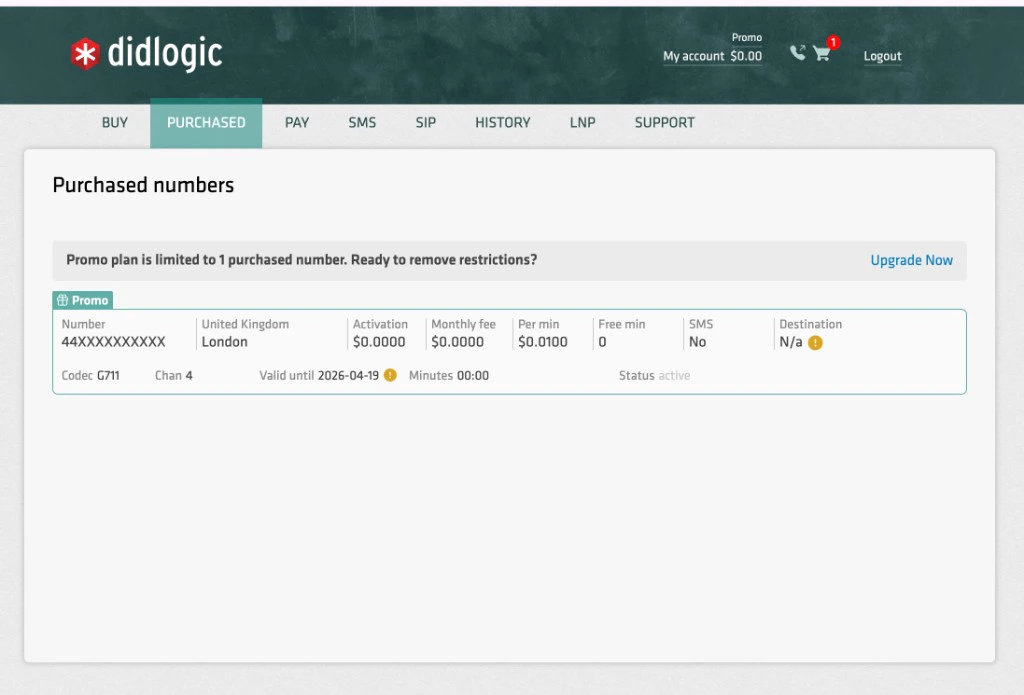
Log in to your DIDLogic dashboard at app.didlogic.com and go to the BUY tab.
Search by country and area code, add a number to your cart, and complete checkout.
Configure Your SIP Account (Outbound)
Go to the SIP tab and click Edit on your SIP account.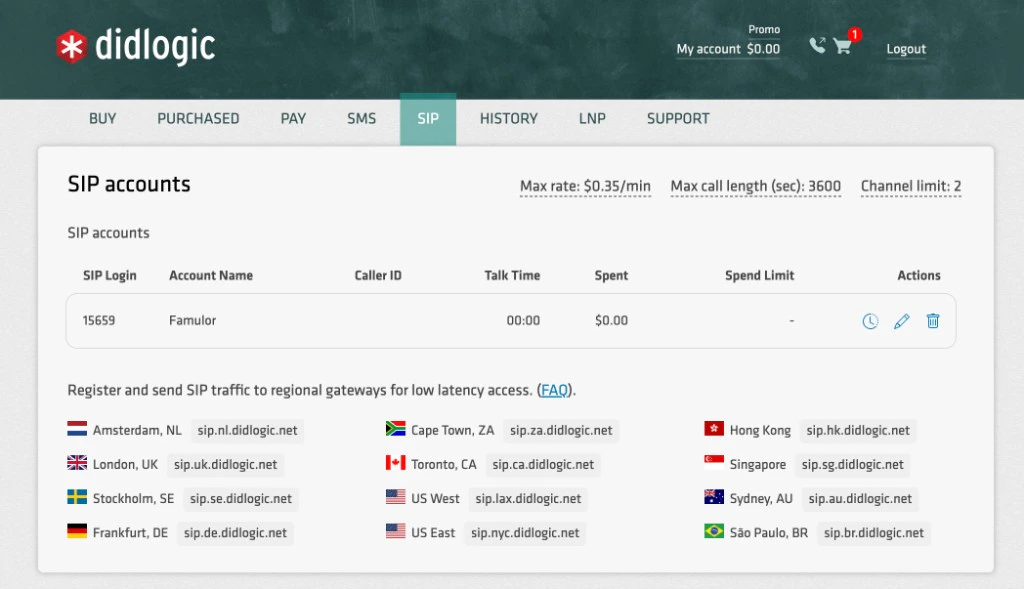
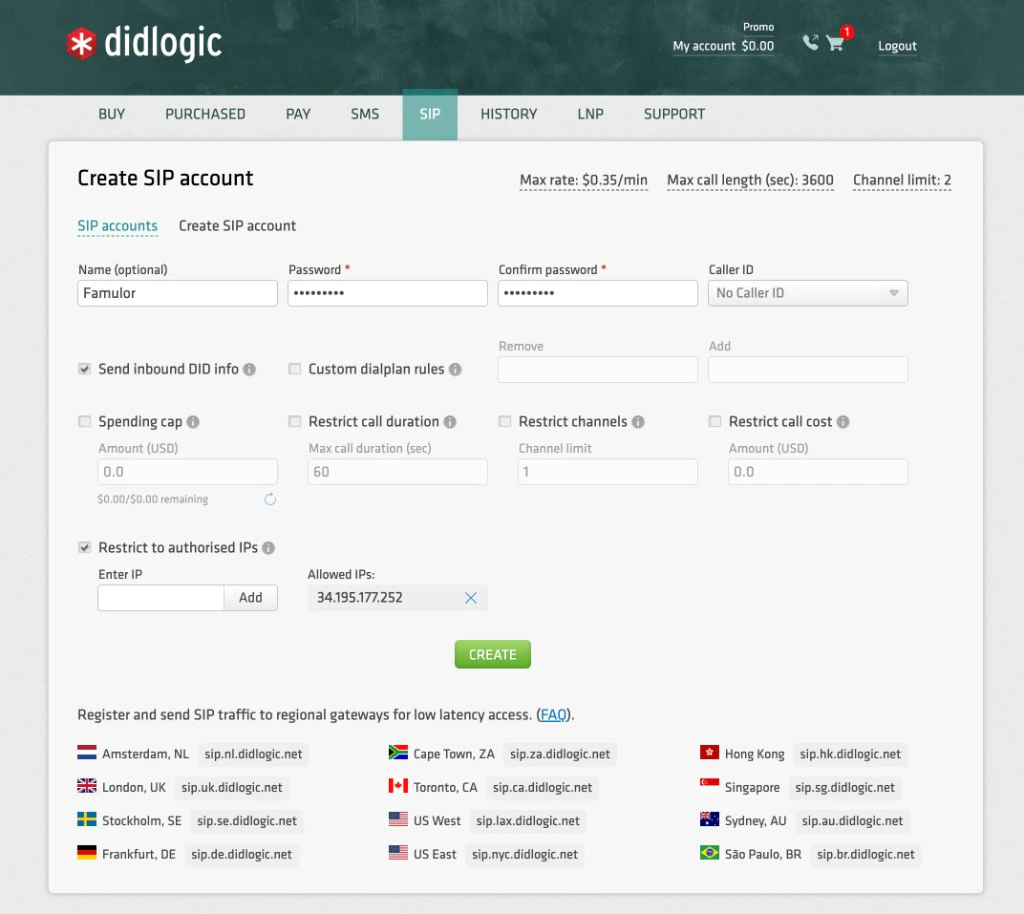
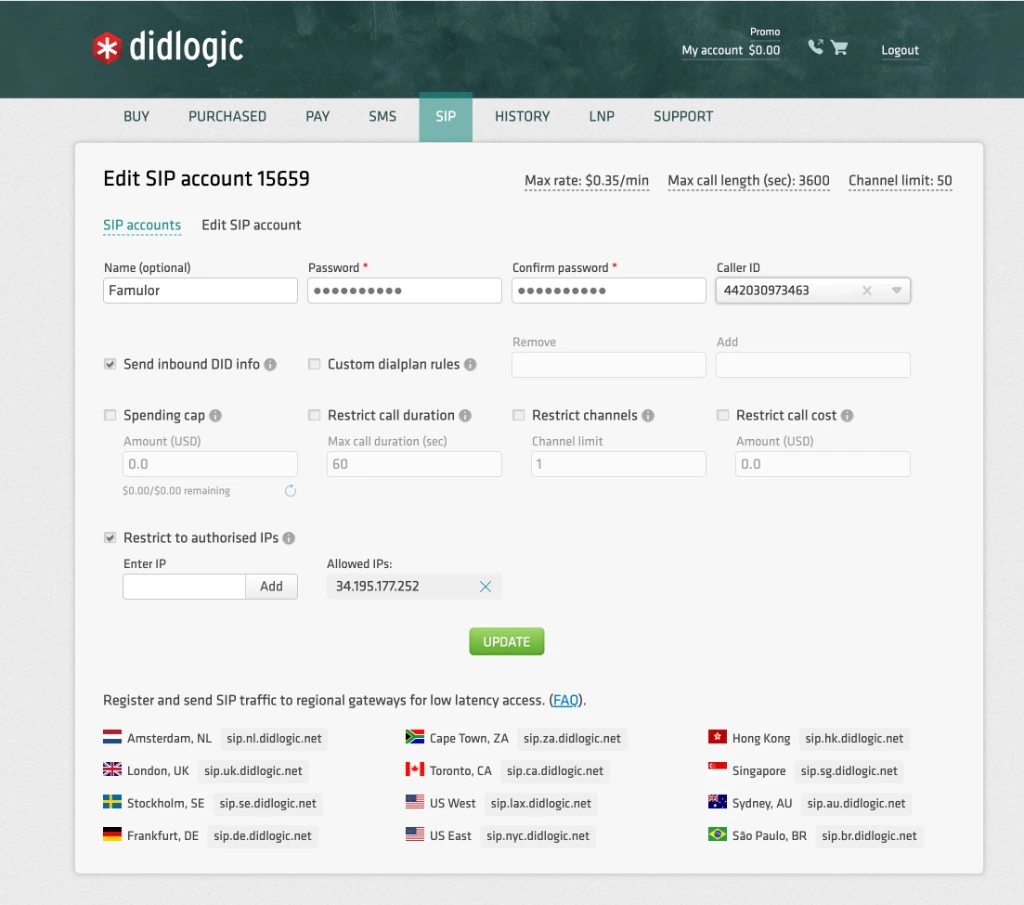
- Enable Restrict to authorized IPs
- Add
34.195.177.252 - Click Add and then Update
Configure Inbound Routing in DIDLogic
Go to PURCHASED and click Destination next to your phone number.Example: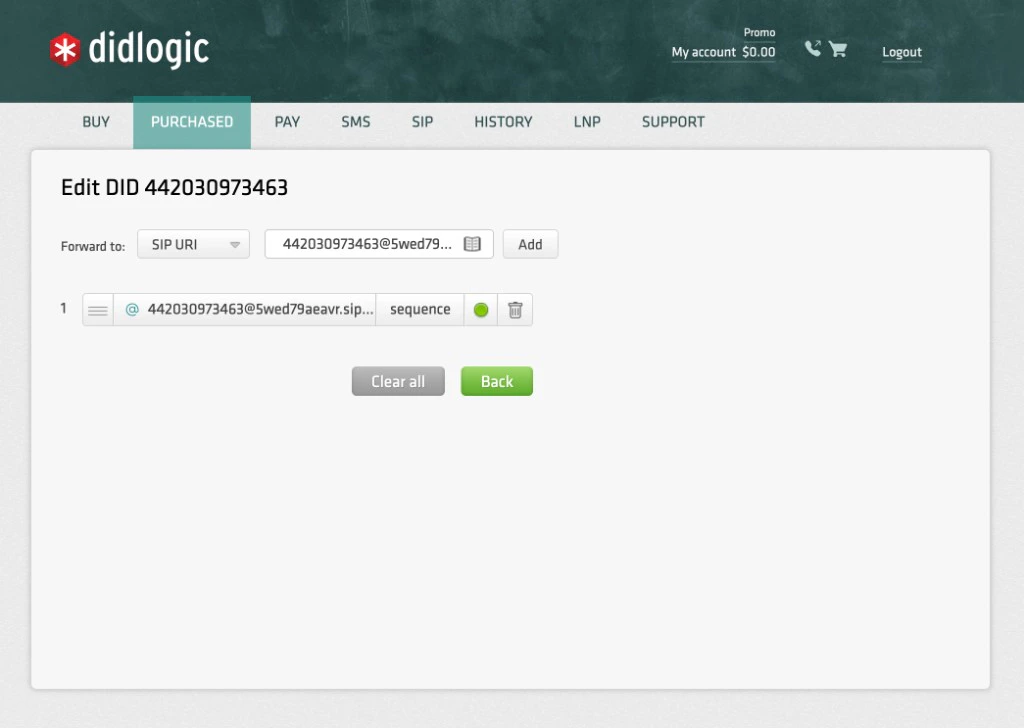
- Remove any existing destination
- Change the selector from SIP device to SIP URI
- Enter this format:
Import Number to Famulor
Go to your Famulor dashboard: Your Phone Numbers -> Integrate SIP trunk.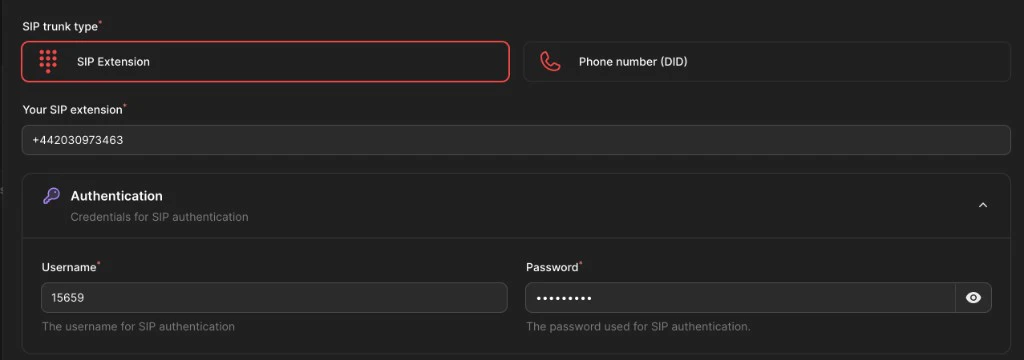

Select the country where your SIP trunk is located.
- Phone number: DIDLogic number in E.164 (example
+15551234567) - Username: SIP account number from Step 2 (example
12345) - Password: The password set in Step 2
- Paste the regional SIP URI copied in Step 2
- Set number format to International with + in front
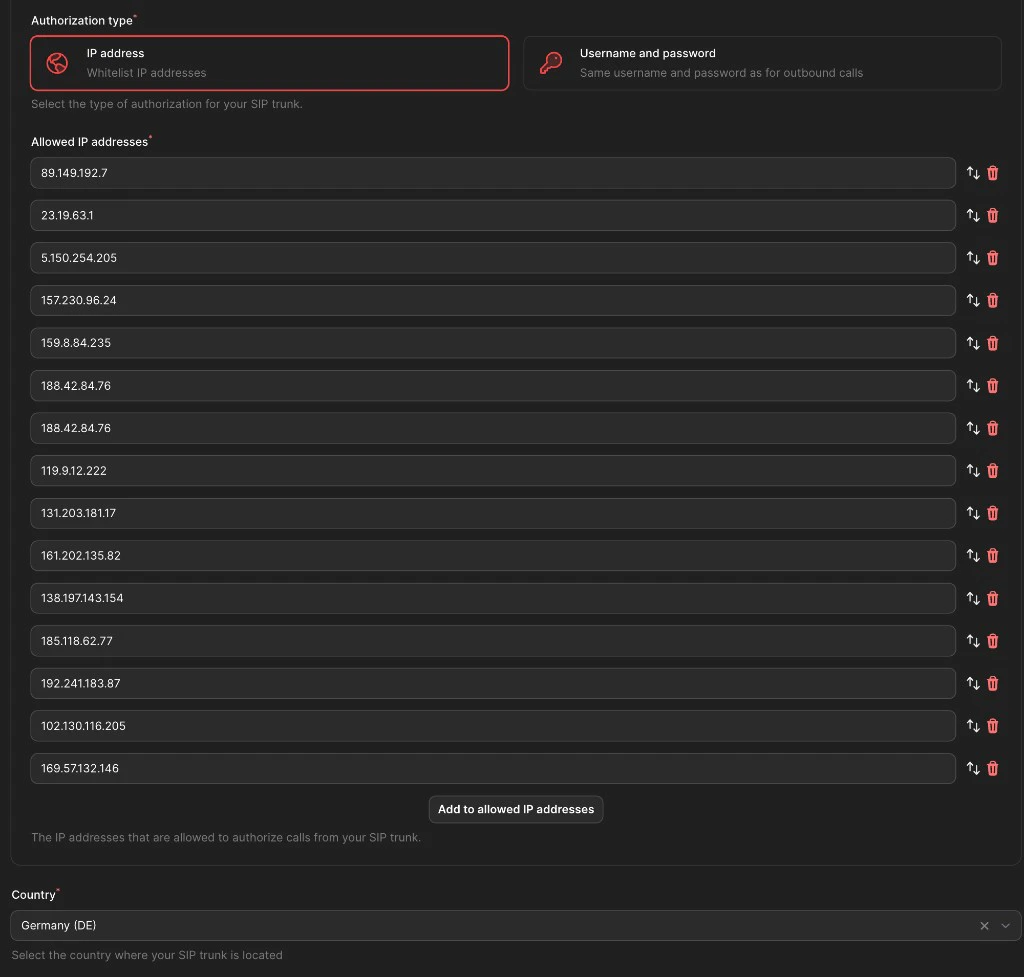
- Enable Outbound call will come from a fixed IP address
- Set authorization type to IP Address
- Add the gateway IP for your selected DIDLogic region:
| Gateway | IP Address |
|---|---|
| sip.nl.didlogic.net | 89.149.192.7 |
| sip.uk.didlogic.net | 23.19.63.1 |
| sip.se.didlogic.net | 5.150.254.205 |
| sip.de.didlogic.net | 157.230.96.24 |
| sip.fr.didlogic.net | 159.8.84.235 |
| sip.hk.didlogic.net | 188.42.84.76 |
| sip.sg.didlogic.net | 188.42.84.76 |
| sip.au.didlogic.net | 119.9.12.222 |
| sip.nz.didlogic.net | 131.203.181.17 |
| sip.ir.didlogic.net | 161.202.135.82 |
| sip.ca.didlogic.net | 138.197.143.154 |
| sip.lax.didlogic.net | 185.118.62.77 |
| sip.nyc.didlogic.net | 192.241.183.87 |
| sip.za.didlogic.net | 102.130.116.205 |
| sip.br.didlogic.net | 169.57.132.146 |
Security Requirements
Your SIP credentials must be secure:- Minimum 12 characters
- Include numbers
- Include uppercase and lowercase letters
- Special characters are recommended
Common Issues
Outbound calls are not working
Outbound calls are not working
- Verify the regional SIP URI copied in Step 2 and remove trailing spaces.
- Confirm the username is the numeric SIP account number (example:
12345), not your email or account name. - Confirm the password in Famulor exactly matches DIDLogic SIP settings.
- Verify
34.195.177.252is added in DIDLogic authorized IPs.
Inbound calls are not working
Inbound calls are not working
- In DIDLogic, destination must be SIP URI (not SIP device).
- Verify destination format:
- In Famulor inbound settings, verify the added IP matches your selected DIDLogic regional gateway.