Connect Starface to Famulor
This guide shows how to connect your Starface phone system to Famulor using a SIP trunk. Your AI assistant answers inbound calls; transfers from Famulor must use SIP to avoid call loops.The Starface line may show as “not registered” — that is expected for IP/host-based SIP to Famulor and is not an error.
Prerequisites
- Starface system with admin access to Configuration → Lines (Leitungen)
- Famulor account
- A free phone number not already used elsewhere in Starface
- Your Famulor SIP address from the dashboard
Step 1: Create a line in Starface
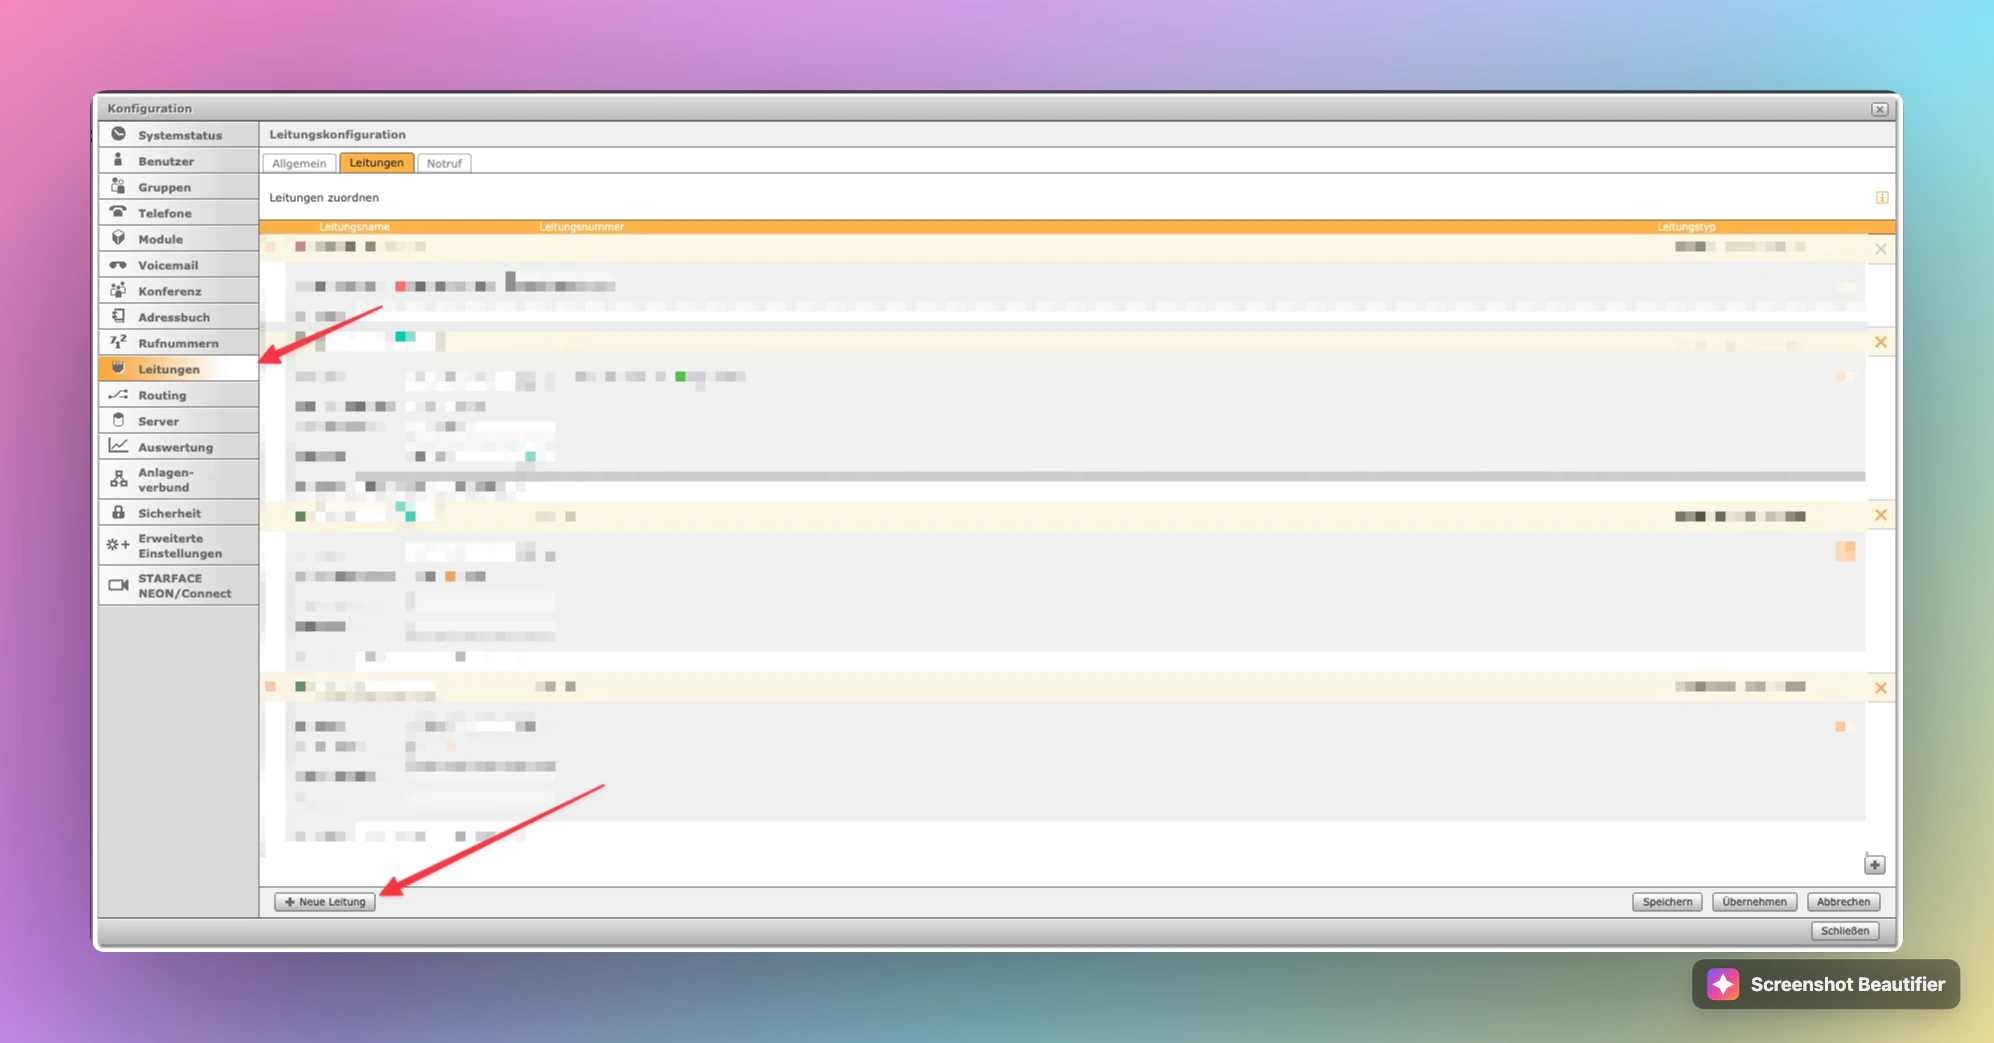
1.1 Add a new line
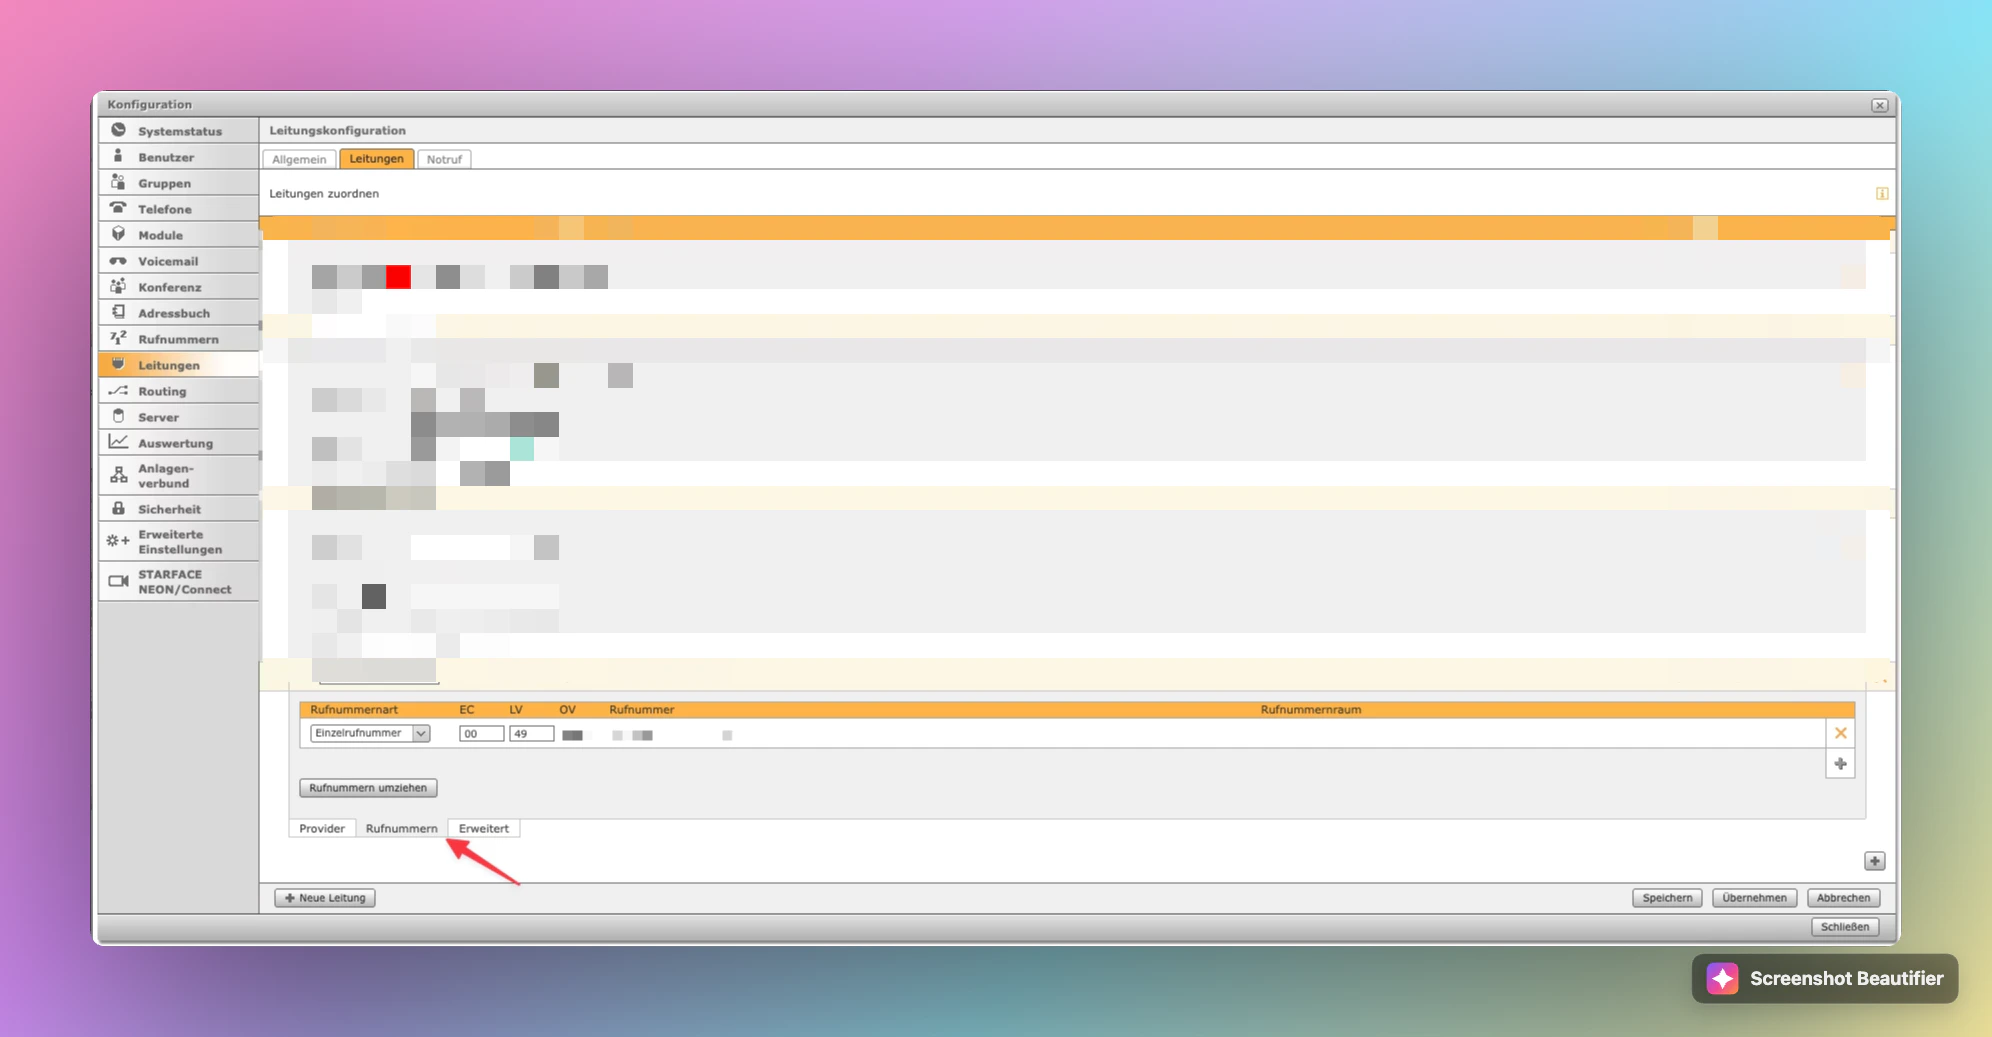
- In Starface, open Configuration → Lines (Leitungen).
- Open the Leitungen tab.
- Click + Neue Leitung (New line) at the bottom left.
1.2 Find your Famulor SIP address
Use this address for host and fromdomain in Starface:- Open app.famulor.de/phone-numbers.
- Click + Integrate SIP trunk (or open SIP integration on an existing number).
- Under Inbound settings, copy Our SIP address (for Germany/Europe, usually the France, Germany, Zurich region).
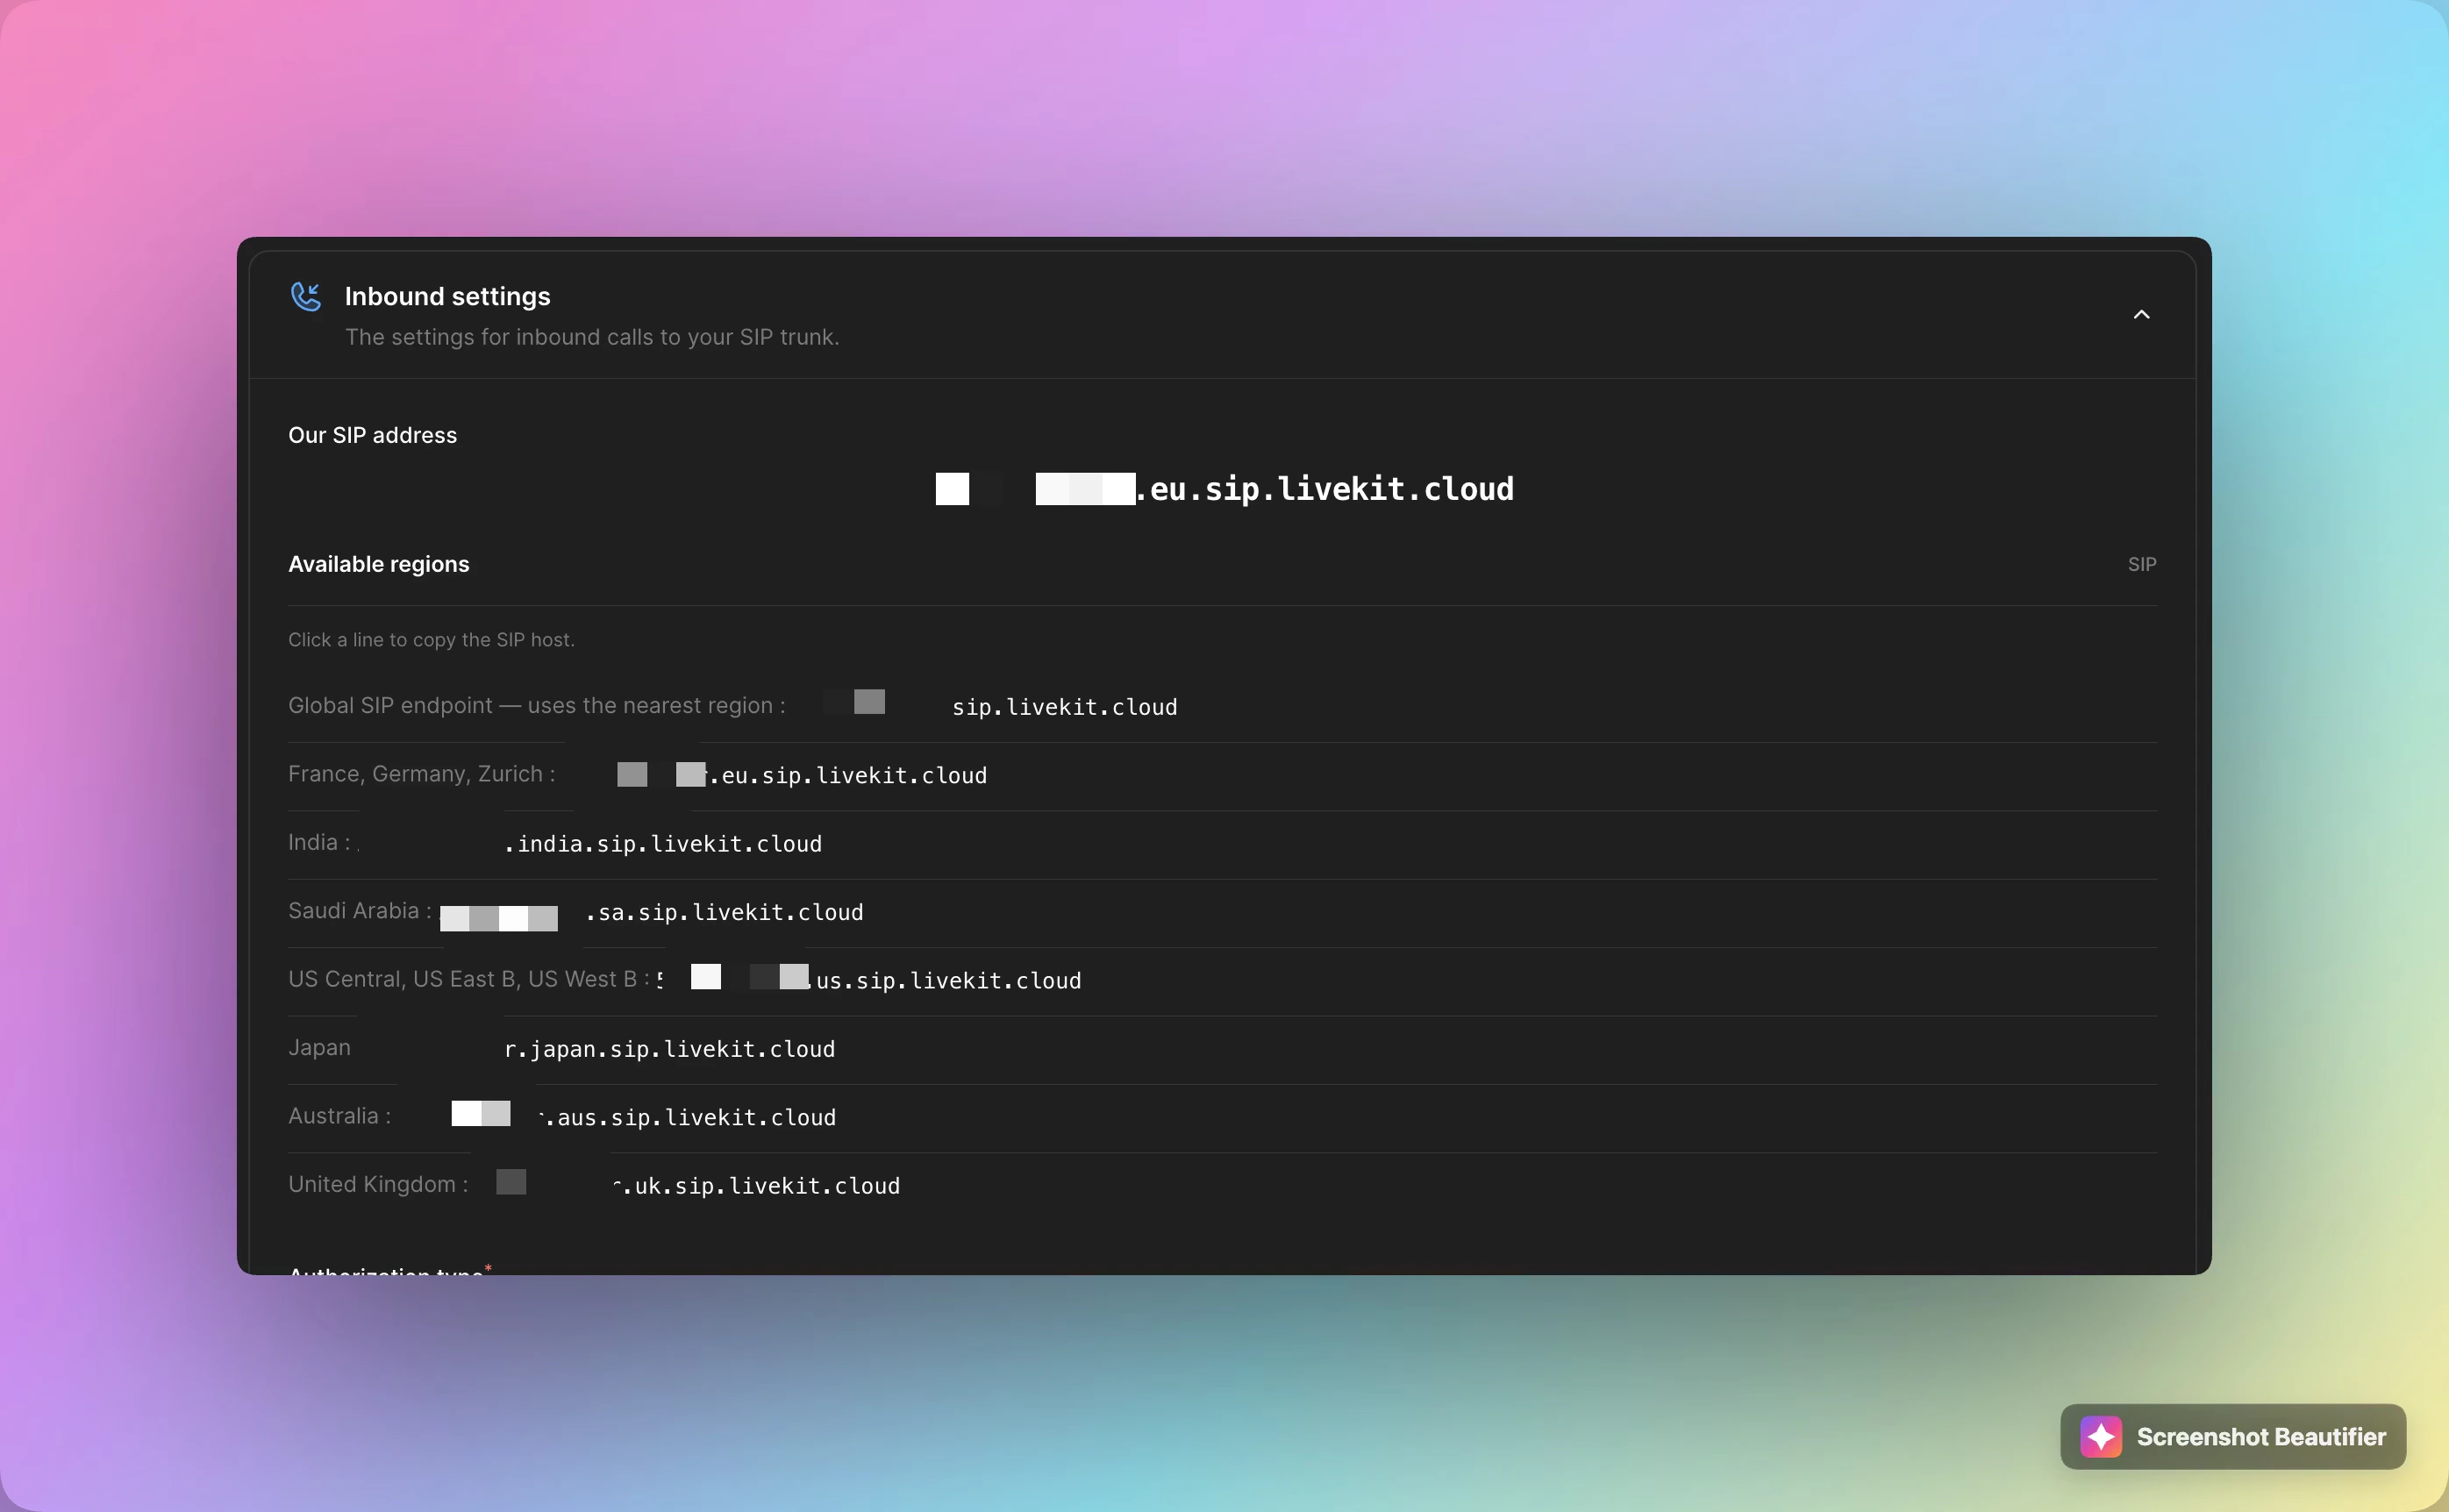
In Starface, enter only the hostname (e.g.
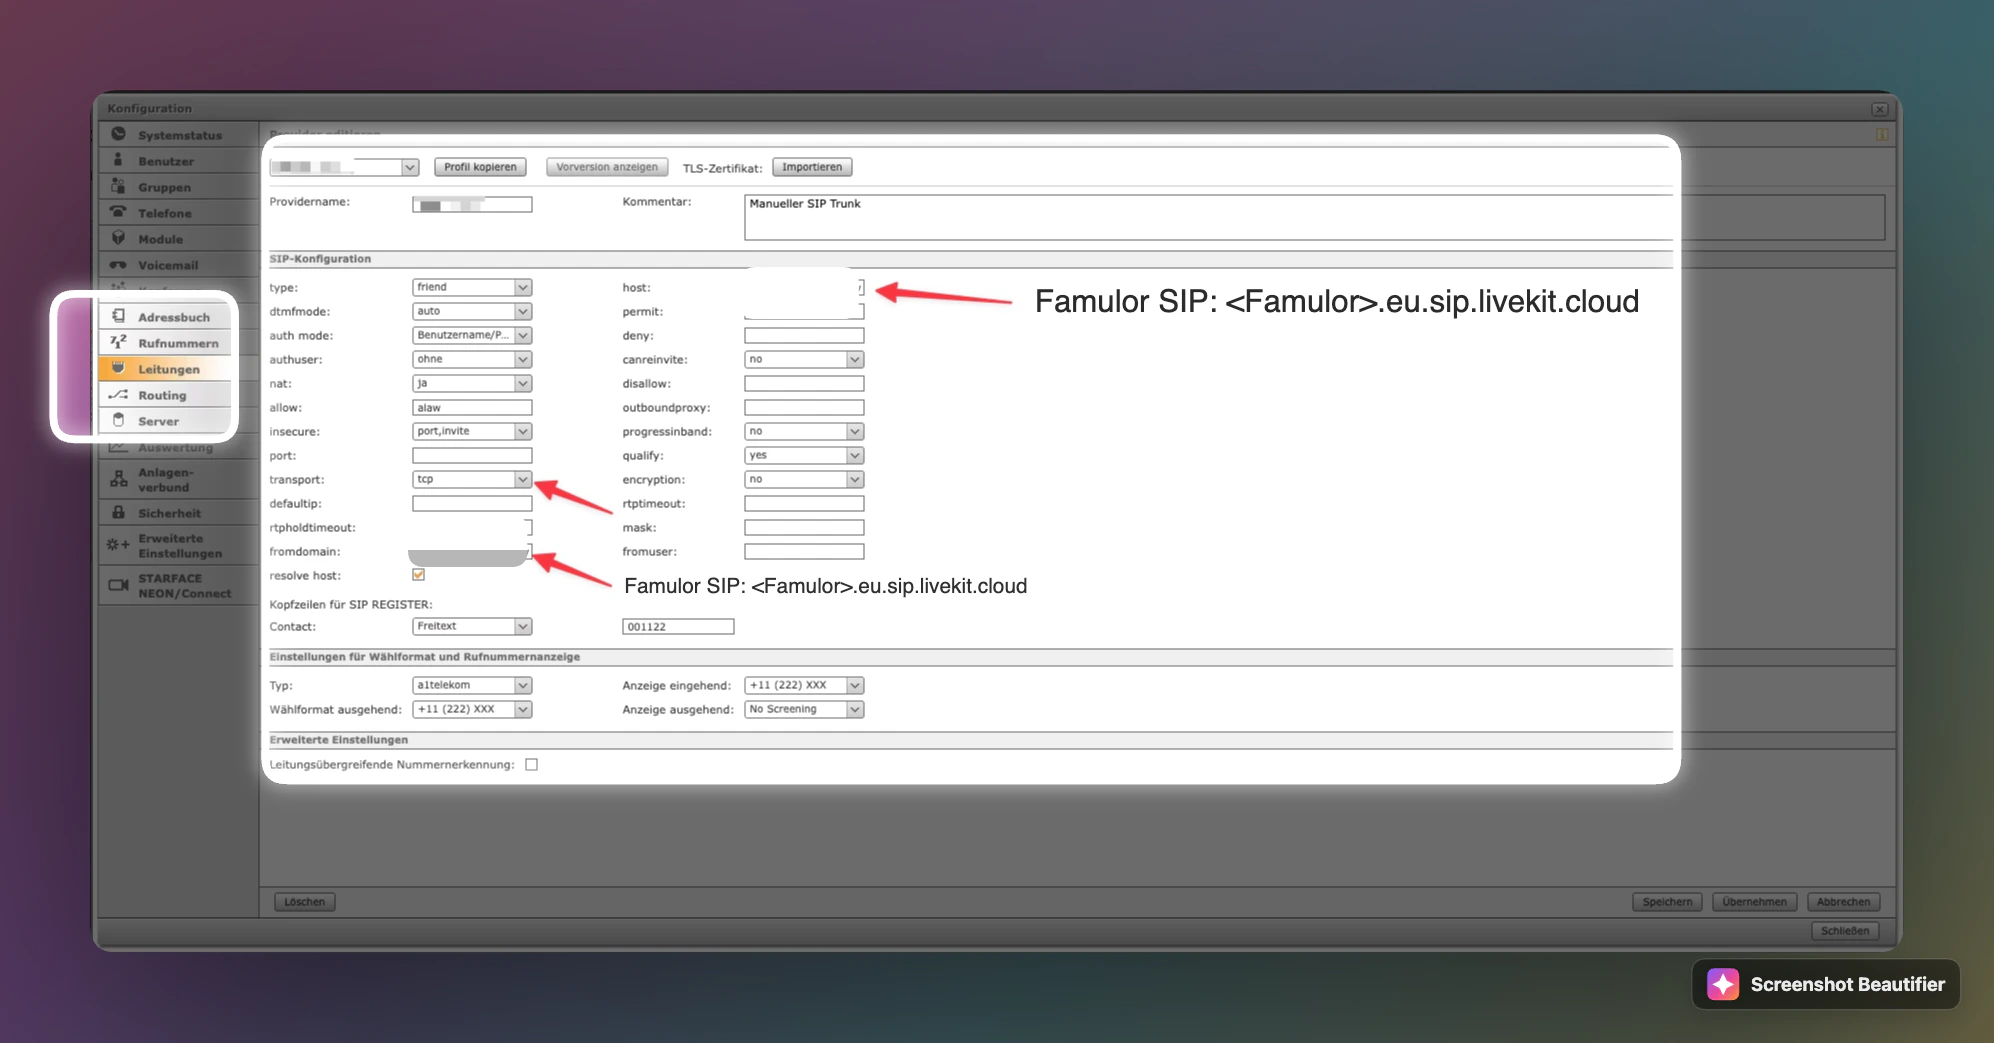
yourproject.eu.sip.livekit.cloud) — without a sip: prefix.1.3 Configure the SIP provider in Starface
- Select the new line and open the Provider sub-tab.
- Under SIP configuration, set:
1.4 Add a phone number to the line
- Stay on the line and open the Rufnummern (Phone numbers) sub-tab.
- Add the number as Einzelrufnummer (single number) with country code 49 and the correct area code and subscriber number.
- The number must not already be in use on another line or service.
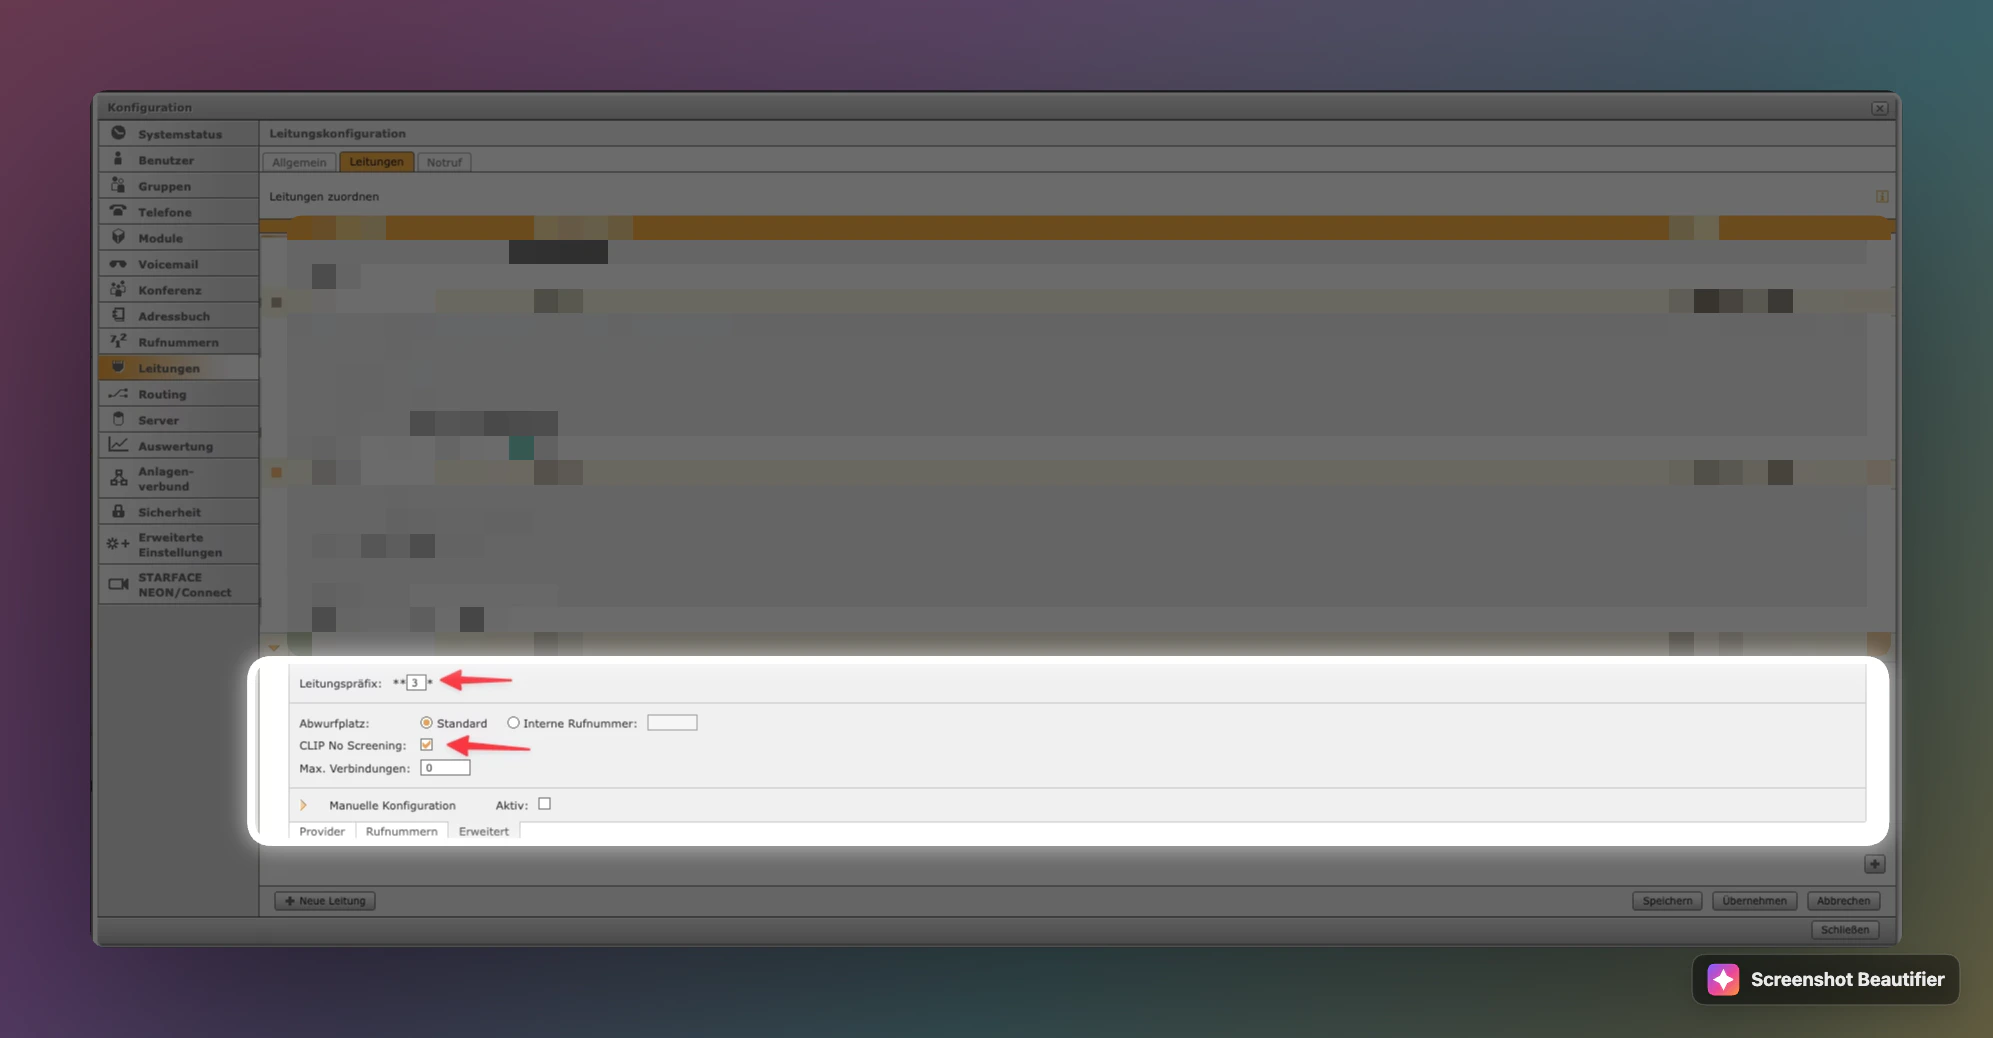
1.5 Enable CLIP No Screening
- In line settings ( Leitungen tab, line selected), enable CLIP No Screening.
- Note the line prefix (e.g.
**2*or**3*) — you need it for time-based forwarding.
Step 2: Create the number in Famulor
- Open app.famulor.de/phone-numbers.
- Click + Integrate SIP trunk.
- Enter the same phone number you configured on the Starface line (E.164, e.g.
+4915112345678). - SIP address / termination: only required if Famulor should place outbound calls via Starface; otherwise leave blank for inbound-only setups.
- Save the number and copy Our SIP address if needed for Starface routing.
Use SIP for transfers only
- Open the assistant → Tools → Call transfer.
- Enable (Advanced) Is custom SIP transfer?
- Under Custom SIP transfer, enter the destination (e.g.
tel:…or Starface format**<line-digit>*<phone-number>). - Set When to transfer to define when the handoff happens (e.g. when the caller asks for a human).
Step 3: Assign a Starface user
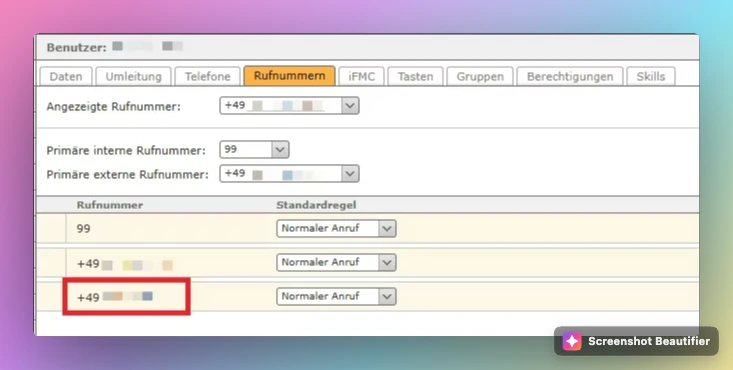
Starface cannot use the SIP number for calls and rules until it is assigned to a user.- Go to Configuration → Users (Benutzer) and select the user.
- Open the Rufnummern (Phone numbers) tab.
- Assign the external SIP number from the line (e.g. rule Normaler Anruf / normal call).
Step 4: Set up time-based forwarding
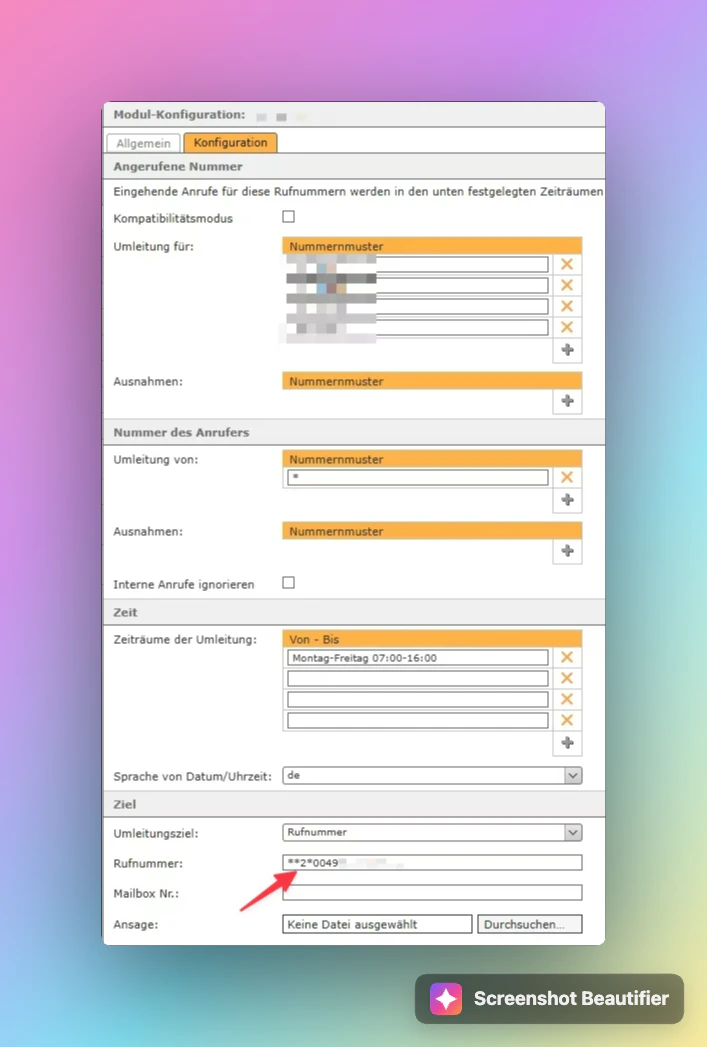
Configure routing (e.g. Modules → Zeitgesteuerte Umleitung / time-based forwarding) to send calls to Famulor.- Called number: the Starface number that should reach Famulor.
- Destination type: Rufnummer (phone number).
- Number in this exact format:
**<line-digit>*<phone-number>
Example with prefix**2*and number004915112345678:
**2*004915112345678 - Set time windows as needed (e.g. Mon–Fri 07:00–16:00).
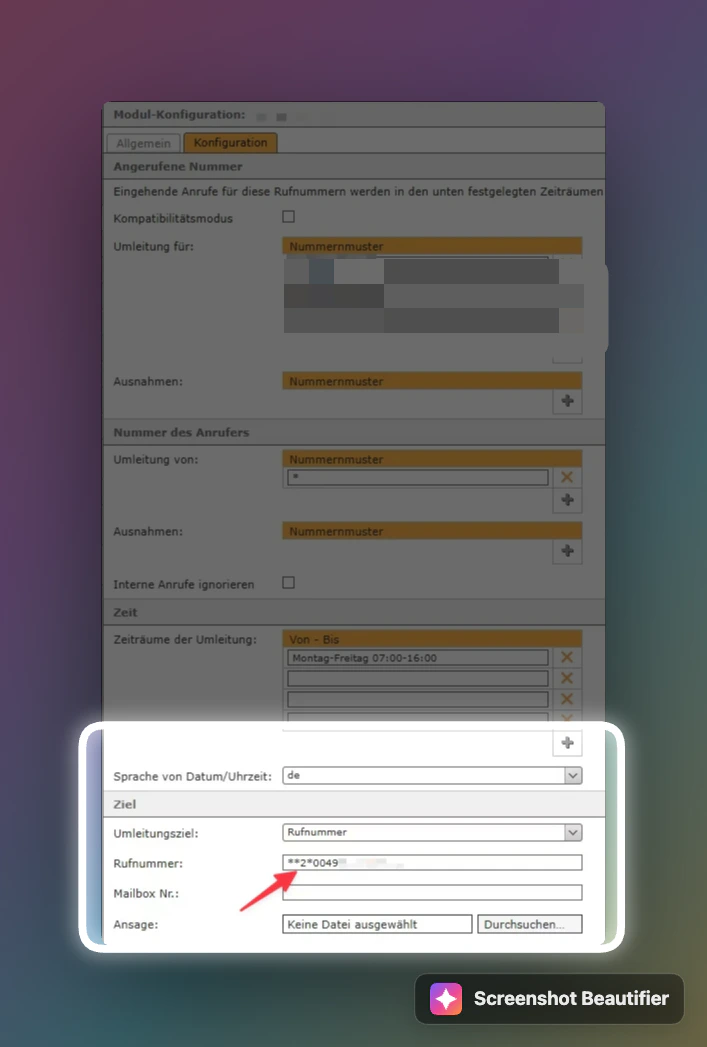
Digits after
* use the international dial string without + (00 + country code + number). The prefix comes from step 1.5.Step 5: Assign an assistant and test
- In Famulor, open Assistants and edit the desired assistant.
- Select the correct inbound type and the imported phone number.
- Save assistant and place a test call.
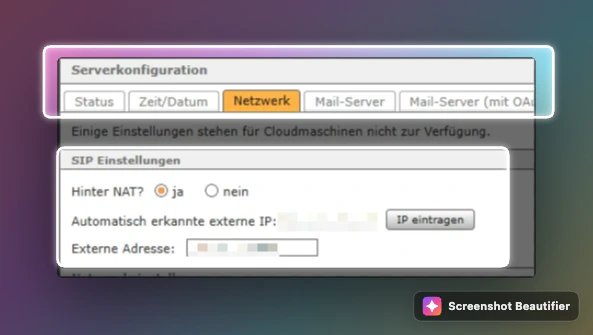
Troubleshooting: No audio / NAT
Symptom: One-way audio or silence on Starface Cloud or with the assistant. Fix: Enable NAT in Starface so RTP (audio) reaches the correct endpoint.- Open Server configuration → Network.
- Under SIP settings, set Behind NAT? to yes.
- Verify external address or use Enter IP if auto-detection fails.
- On the line (Provider), set nat to Yes.