Connect a Fonial Number to Famulor
This guide walks you through connecting a Fonial phone number to Famulor step by step.Famulor has no dedicated „Fonial import”. You connect your Fonial number like any other provider through the Integrate SIP trunk feature in Famulor.The full setup has two parts that work together:
- Outbound calls: a SIP user in Fonial provides the credentials Famulor uses to authenticate to Fonial.
- Inbound calls: a forwarding to SIP-URI in Fonial sends calls to Famulor’s SIP address.
How it works
- Inbound: Famulor does not register via SIP REGISTER at Fonial. Incoming calls reach Famulor through the forwarding to SIP-URI (Step 5).
- Outbound: Famulor authenticates per call with the SIP user credentials at
sip.plusnet.de.
The SIP user stays „Offline” in Fonial – this is correct and not an error. Famulor does not register, so the status never switches to „Online”. Incoming calls run through the forwarding, not through registration.
Prerequisites
- An active Fonial account with at least one phone number
- SIP trunking / SIP user available in your Fonial plan (see Fonial help: Trunking setup)
- A Famulor account
- Access to the Fonial customer portal at kundenkonto.fonial.de
Step 1: Create a SIP user in Fonial
The SIP user provides the credentials for outbound calls.- Sign in to your Fonial customer account.
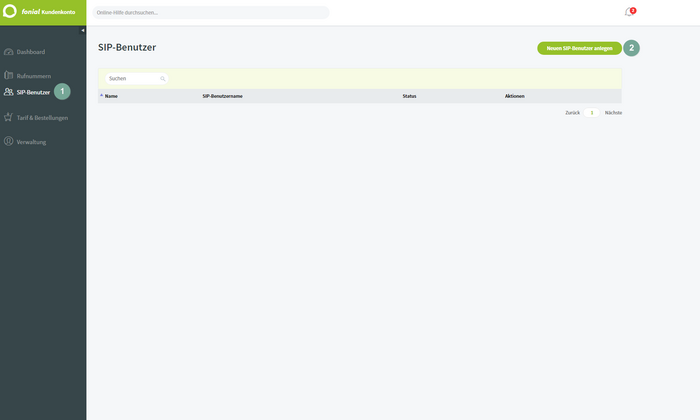
- In the sidebar, open SIP-Benutzer (SIP users).
- Click Neuen SIP-Benutzer anlegen (Create new SIP user) at the top right.
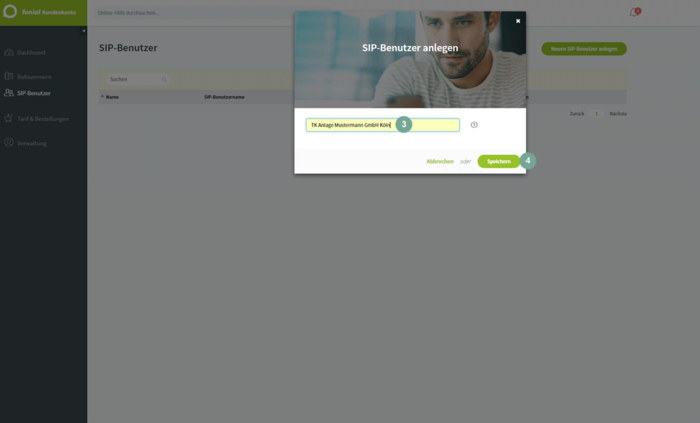
- Enter a name for the SIP user (e.g.
Famulor) and click Speichern (Save).
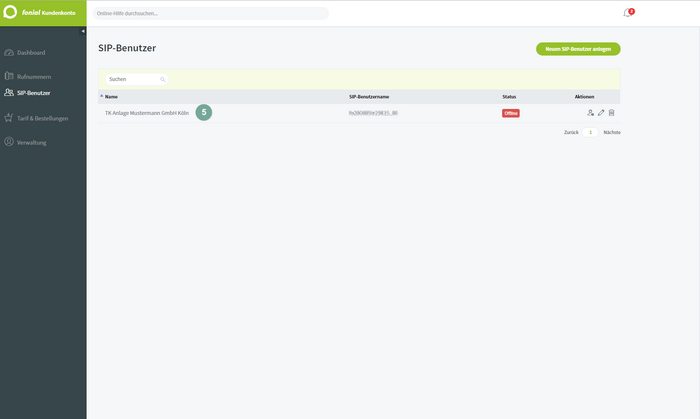
- The new SIP user appears in the list with status Offline. It stays Offline even after setup – see the note above.
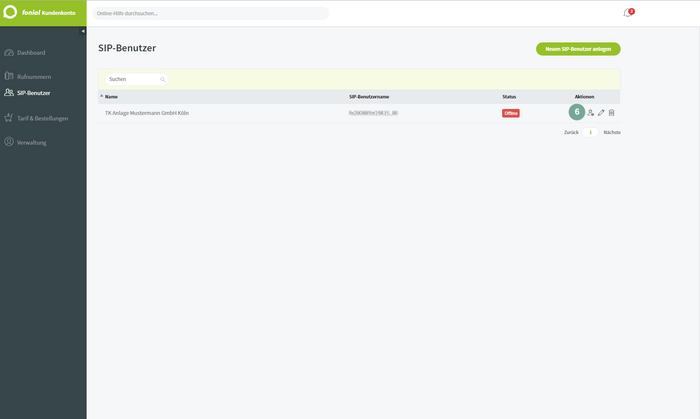
Step 2: Open the SIP user credentials
- In the SIP user row, under Aktionen (Actions), click the credentials icon.
- Note the displayed Zugangsdaten SIP-Benutzer (SIP user credentials):
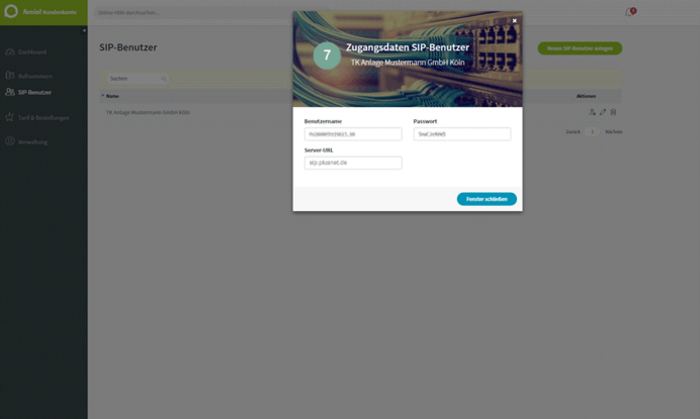
Keep the username and password safe. You need both in Step 4 for the Famulor SIP trunk setup.
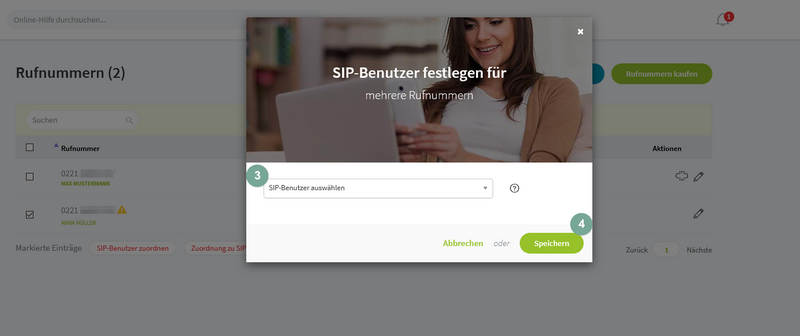
Step 3: Assign the phone number to the SIP user
- In the sidebar, open Rufnummern (Phone numbers).
- Tick the checkbox next to the number you want to connect to Famulor.
- Click SIP-Benutzer zuordnen (Assign SIP user) at the bottom.

- In the SIP-Benutzer festlegen dialog, select the SIP user you just created (e.g.
Famulor) and click Speichern (Save).
Note your Fonial number in E.164 format with country code, e.g.
+498956546546. You need it in the next steps.Step 4: Set up the SIP trunk in Famulor
- Open Famulor at app.famulor.de/phone-numbers?lang=en.
- In the sidebar, go to Your phone numbers.
- Click + Integrate SIP trunk at the top right.
- Enter the data as follows:
- Under Incoming call settings, copy the value Our SIP address (e.g.
xxxxxx.eu.sip.livekit.cloud). You need it in Step 5. - Click Add SIP number.
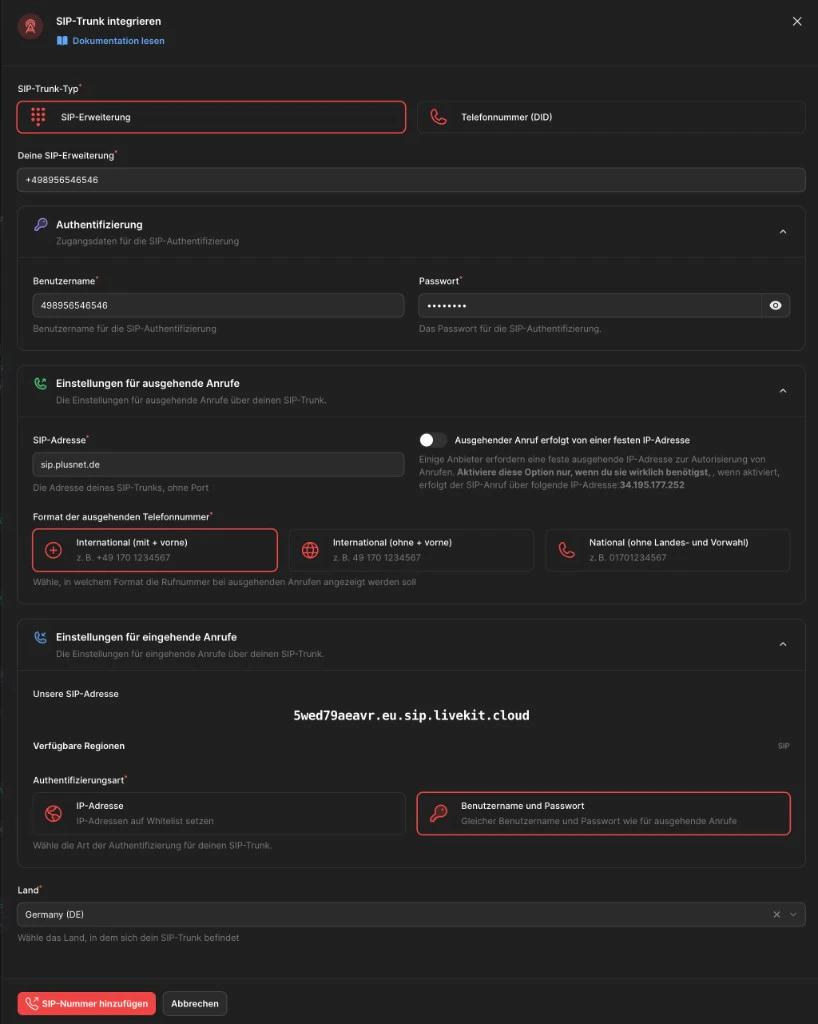
With this configuration, outbound calls are already covered: Famulor authenticates with username and password at
sip.plusnet.de. For inbound calls, set up the forwarding in Fonial in Step 5.Step 5: Create the forwarding to SIP-URI in Fonial (inbound calls)
To make incoming calls arrive at Famulor, create your AI phone assistant as a target in Fonial. Fonial then forwards calls to Famulor’s SIP address.Build the SIP-URI from „Our SIP address”
Build the SIP-URI from your Fonial number and the Our SIP address value you copied in Step 4:+498956546546 and xxxxxx.eu.sip.livekit.cloud become:
The phone number in the SIP-URI must be entered without the plus sign (
+).Create the target in the Fonial customer account
- In the navigation menu, under Telefonanlage, select Ziele (Targets).
- Click Neues Ziel anlegen (Create new target).
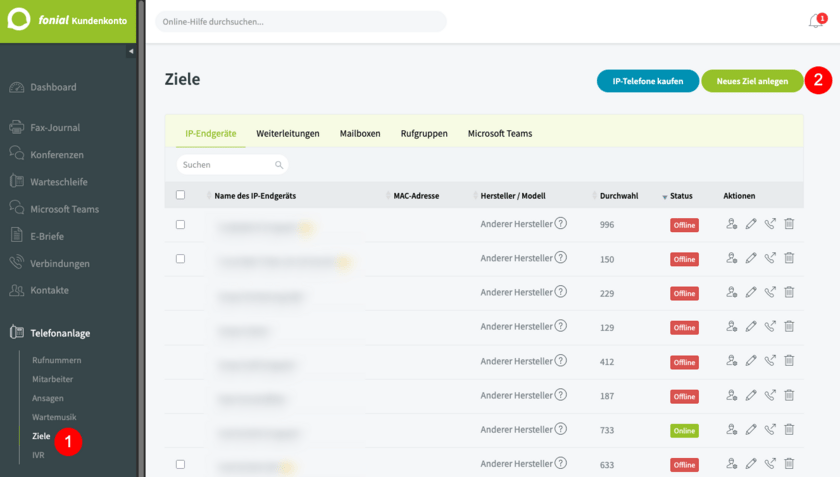
- Choose Weiterleitung (Mobilfunk, Festnetz, Fax oder SIP-URI) as the target type.
- Enter a name for the forwarding target (e.g.
Famulor). - In the dropdown, select Weiterleitung auf SIP-URI (Forward to SIP-URI).
- Under SIP-URI, paste the SIP address you built above.
- As the outgoing phone number (Ausgehende Rufnummer), select the Fonial number you want to connect to Famulor.
- Finally, click Speichern (Save).

Step 6: Assign an assistant and test
To have incoming calls answered by your AI assistant, assign the number to an assistant.- Open Assistants in Famulor and edit the assistant you want to use.
- Select the correct inbound type (incoming calls).
- Choose your connected Fonial phone number from the list.
- Click Save assistant.
- Place a test call to your Fonial number and check that the AI assistant answers.
Common issues
SIP user shows „Offline“
SIP user shows „Offline“
This is normal and not an error. Famulor does not register via SIP REGISTER at Fonial, so the SIP user stays „Offline”. Incoming calls run through the forwarding to SIP-URI (Step 5), not through registration.
Inbound calls do not arrive
Inbound calls do not arrive
Check the forwarding to SIP-URI in Fonial (Step 5): SIP-URI in the format
sip:<number without +>@<Our SIP address>, the correct outgoing phone number, and the exact „Our SIP address” from Famulor (no second sip:, no spaces).Outbound calls fail
Outbound calls fail
Check the username, password and SIP address (
sip.plusnet.de) from the Fonial credentials (Step 2) in Famulor. Set the Outgoing phone number format to International (with leading +).Wrong or unknown SIP address
Wrong or unknown SIP address
Use the exact „Our SIP address” from Famulor (Phone numbers → Integrate SIP trunk → Incoming call settings). The phone number in the SIP-URI must be entered without the plus sign.